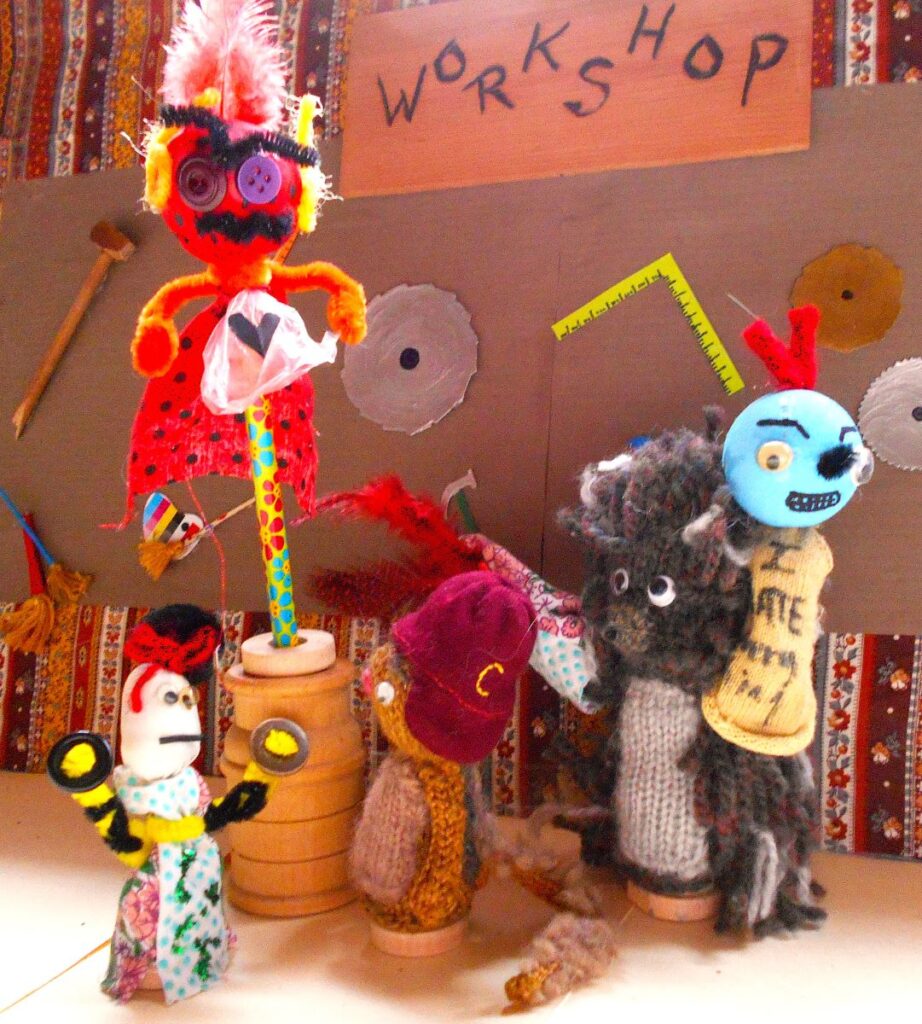
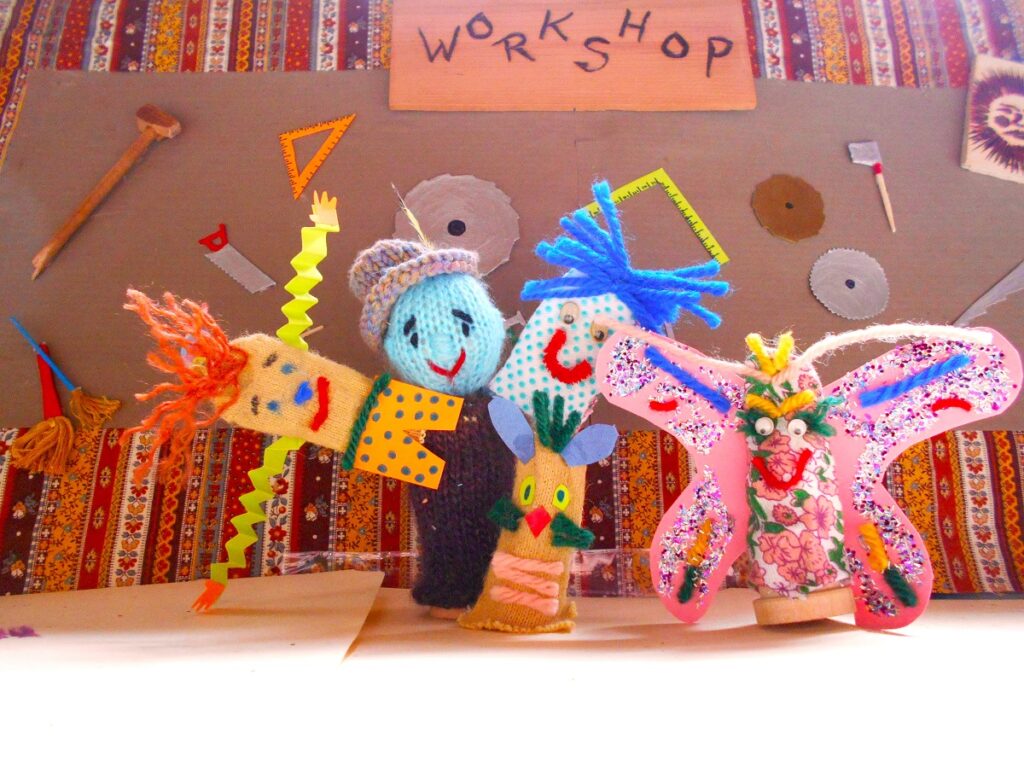
Make a Flippy Book with Wallace & Davis!
Have you ever seen those little flippy books where you can make things move across the page, just by flipping through them? Today you get to make your own!
Just follow the instructions below. Are you ready?
Here’s what you’ll need to get started:
Markers or pen, pencil
a sheet of paper, lined or unlined
stapler
oops! and scissors

Fold your paper in half, then in half again, and in half again two more times.
When you open it up, you should have four little squares across and down the paper.
Now carefully cut on the fold lines. Be sure to ask for help if it’s too hard.
Now draw your “story” in pictures. You need to create the same picture, but just a little higher or lower, or left and right, each time so when you flip the pages the image will move up or down or side to side.
Here you can see how the flowers start low on the page, then get taller page by page.
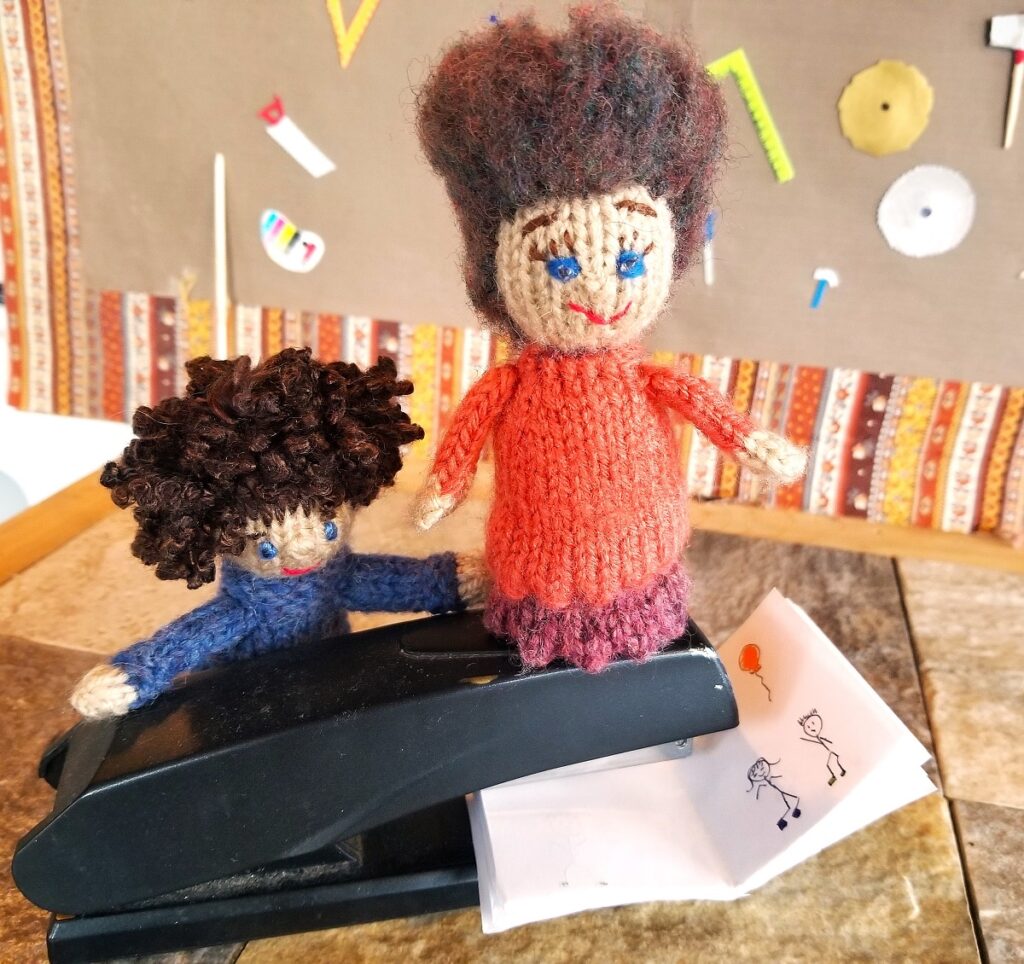
You may need help with this next step because stapling through that many pages can be tough. We had to team up to get ours to work, so don’t be afraid to ask for help!
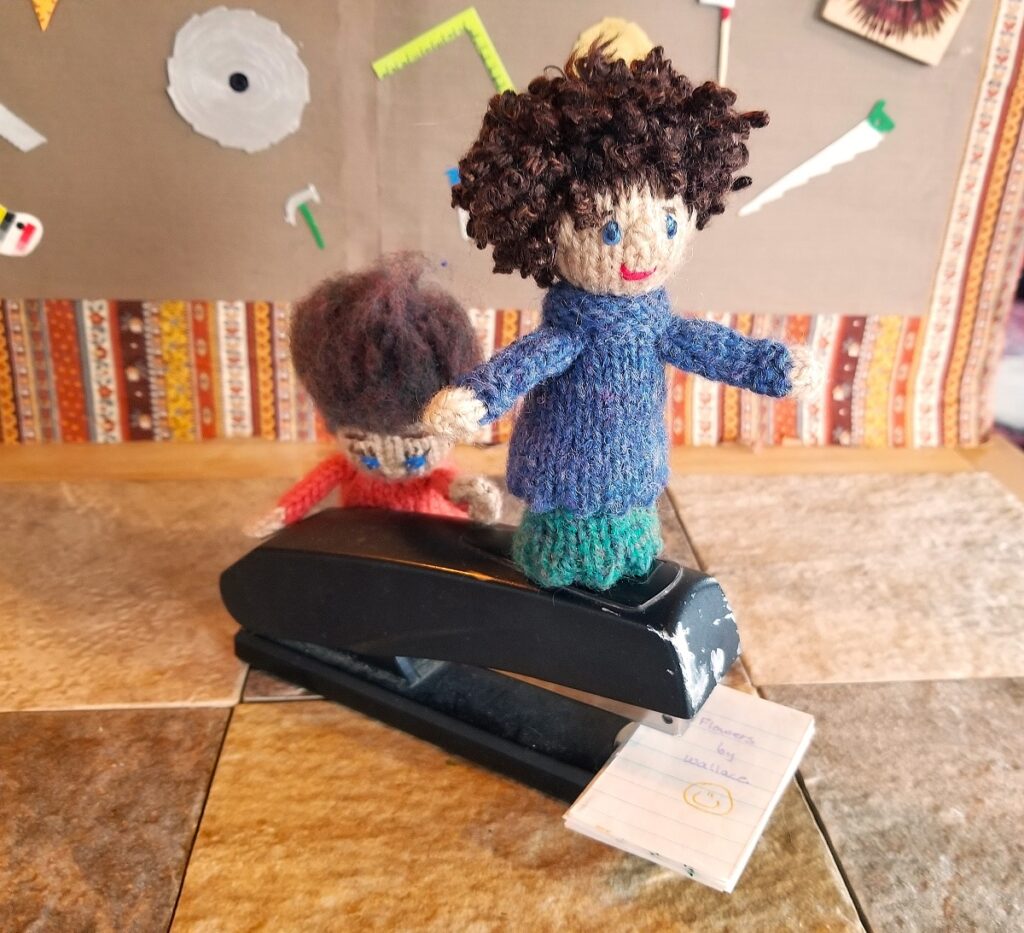
Make sure all the edges of your book are straight. This will make it easier to flip smoothly.
That’s it! We weren’t good at flipping our books while the camera was running, but we think they turned out pretty nice! We look forward to seeing how your stories turned out! Remember to send your pictures or videos to us at phingerplink@gmail.com And keep up the good work!
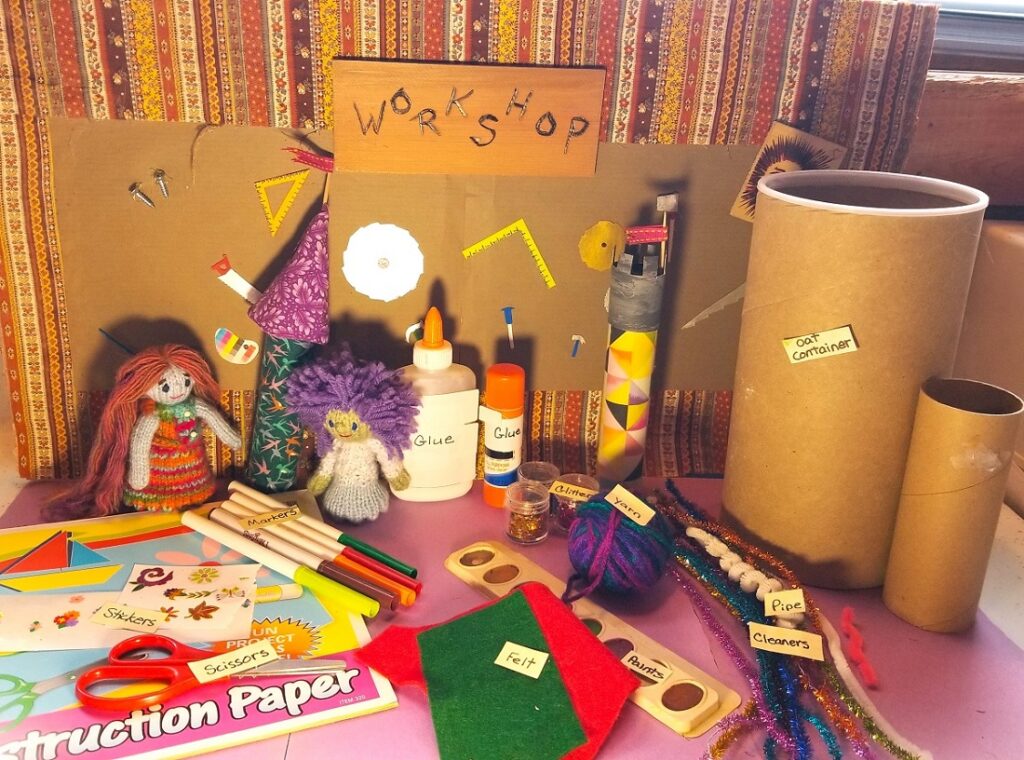
Create a Home-Sweet-Home tree with Ahanu and Zakia!
What’s your favorite kind of tree? Can you see one out the window? Today we’re going to make trees for the theater with Ahanu and Zakia. Are you ready?
You will need:
Scissors/ruler
Pipe cleaners/Wooden dowel, stick, or pencil/black paint
Green tissue paper/construction paper/wrapping paper
Cereal or cracker box
Markers/Glue/glue dots
Googly eyes/Yarn/Cones
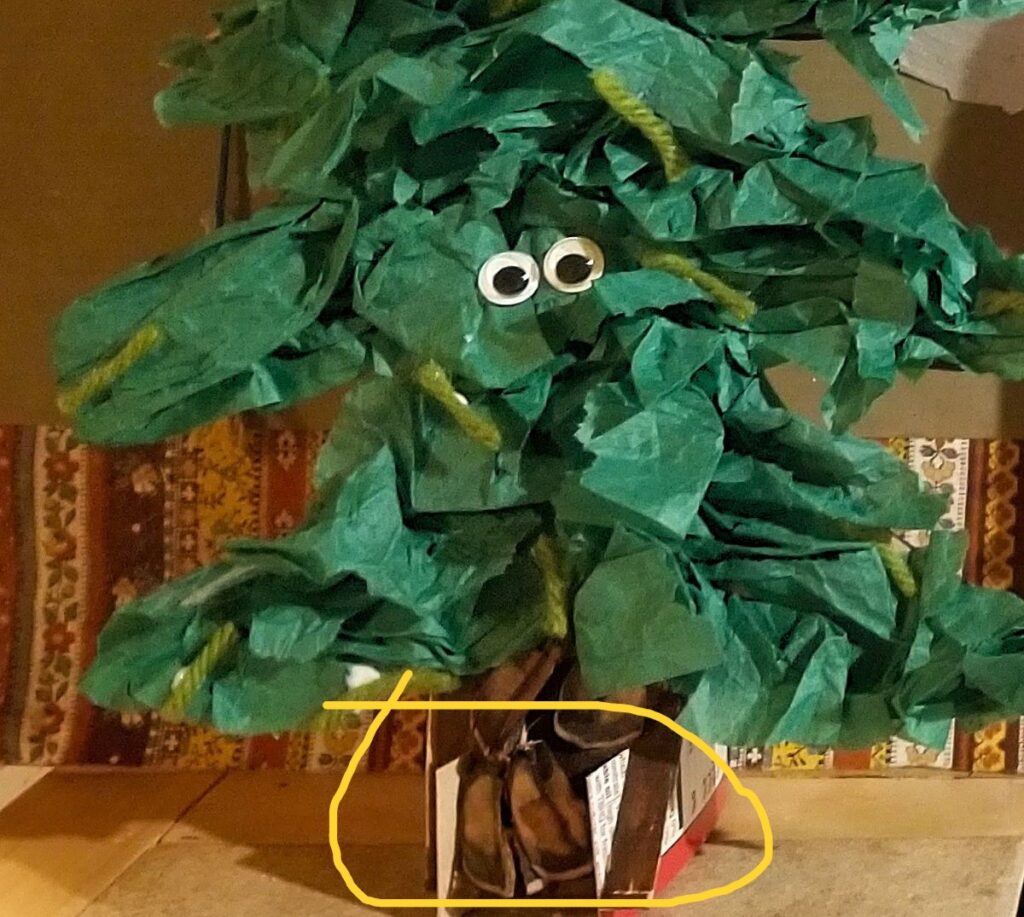
Open up your box and trace or draw your tree shape on the plain side. Carefully cut out your tree. If the cardboard is too hard, ask a grownup for help. No snipped fingers in Phingerplink Workshop today!
Color some pipe cleaners with brown or black markers. These can dry while you work on your trees. Color your dowel, stick, or pencil black and let it dry.
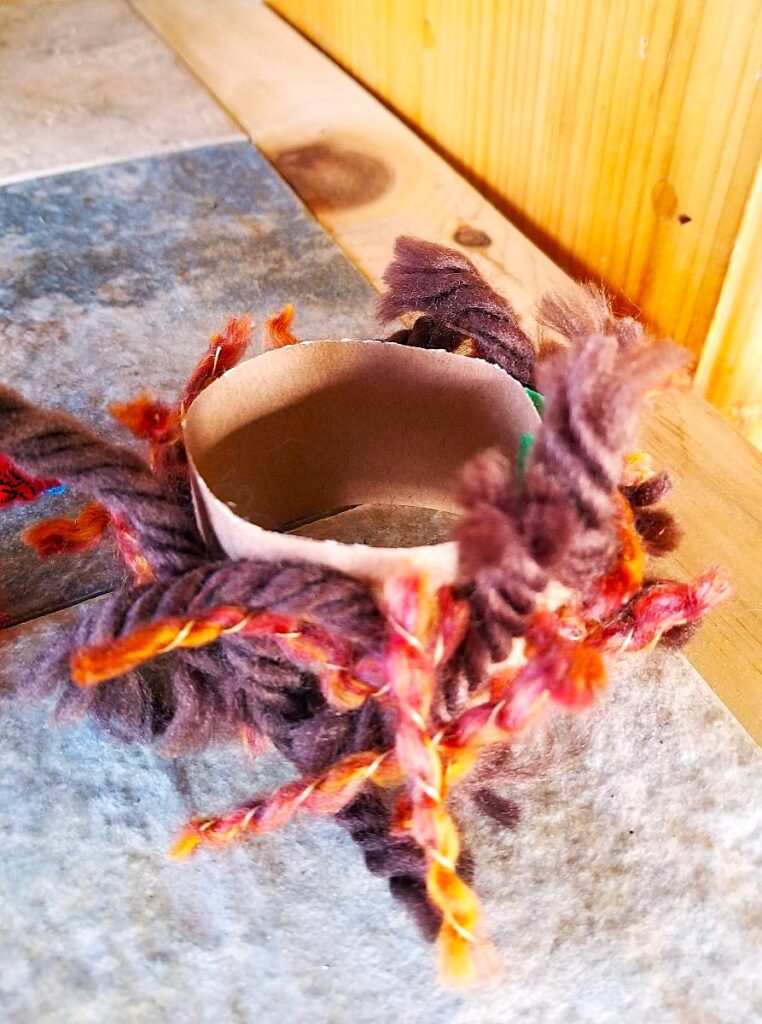
Cut two 1″ slits in the bottom trunk of your tree shape – see blue lines in the photo.
Cut a strip from your box 1″ x 6″. This is your tree stand.
Cut a strip 1″ x 5″ from your green construction paper or from your box. Make it into a circle, overlapping ends by 1/2″ and glue in place. You can use a clothespin to hold it until it’s dry. This is the frame for your nest.
Cut strips of yarn or break up some cones or twigs and glue them around the outside of the circle.
Ahanu prefers yarn strips because they’re much softer than twigs or cones.
Cut or tear strips of green tissue paper or construction paper, or color leaves on regular paper and cut them out. Cover your tree shape with glue (or use glue dots) and place your leaves around the tree until every space is filled. Glue cone pieces, yarn, or twigs to the trunk.
Wrap a pipe cleaner or two around the tree and twist them into interesting shapes as bare branches. You can add google eyes if you like. Zakia likes the eyes.
When everything is dry, bend your tree stand in half and slide it into the base of your tree trunk with the point at the back – see the yellow circle in the photo. This should allow your tree to stand without tipping over.
Carefully place your nest in the top of a tree, leaving enough space for your puppet to slide up through the bottom of the nest. Using your pencil or dowel to move the puppet up into the nest keeps your hands from showing. It’s the magic of theater! Ahanu loves his nest! Zakia loves hiding behind the branches of her tree.
As always, we can’t wait to see your trees. Did you make a whole forest? Send a picture to phingerplink@gmail.com
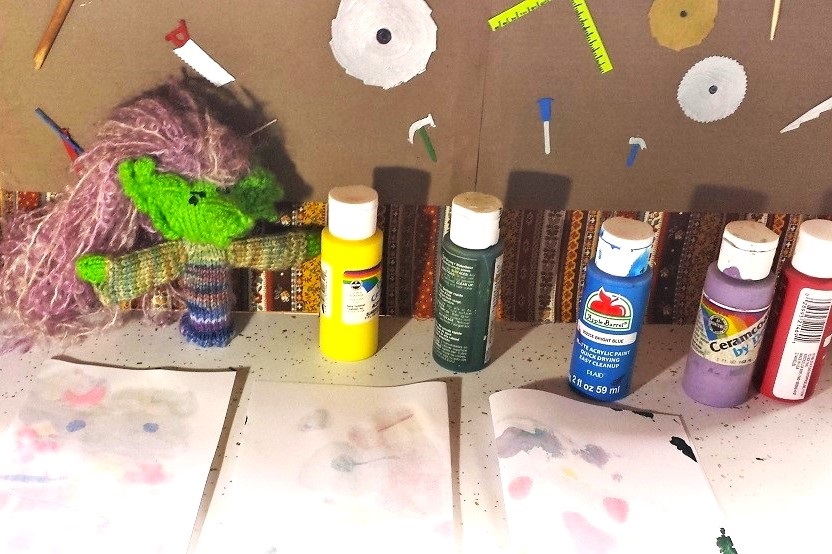
Create Fear Art with Little Ears and Ahanu!
How do you face fear? Ahanu says, “Forget Everything And Run!” Little Ears says, “Face Everything And Rise!” Let’s make a monster/master fear poster!
You will need:
Scissors, ruler/yardstick
Poster board
Magazine/greeting card/newspaper pictures, words and letters
Construction paper
Aluminum foil
Markers, Glue, Glitter, Paint

Make a lightning bolt shape from the aluminum foil and glue it down the center of the poster board.
Draw with marker or paint, or cut the letters F E A R from a magazine, newspaper, cards, (the bigger, the better!) and glue them across the top of the poster board.

Cut pictures and words from the magazines, cards, or newspapers, that seem scary to you, like hairy spiders with glowing eyes, or creepy clowns. Glue them on the FORGET EVERYTHING AND RUN side of the poster. Cut pictures and words about brave things, like playing your violin in public, or learning to ride a horse. Glue these on the FACE EVERYTHING AND RISE side. Sprinkle glitter or paint spatters on your poster and hang it in your room to inspire you.
Remember to send us a picture of your awesome poster! phingerplink@gmail.com
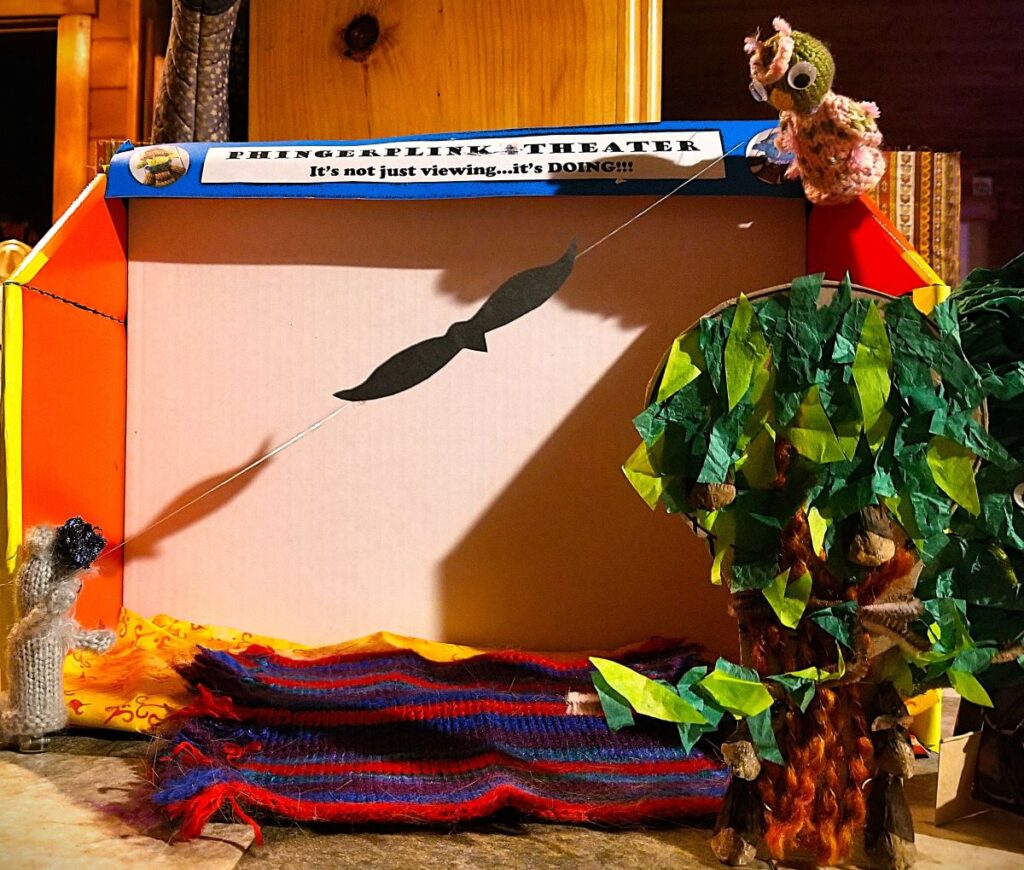
Create Silhouettes and a Zip Line with Little Ears and No Ears!
You will need:
Scissors/pencil
Black construction paper
3 drinking straws
Tape/glue dots
Thread/string/fishing line
Wax paper

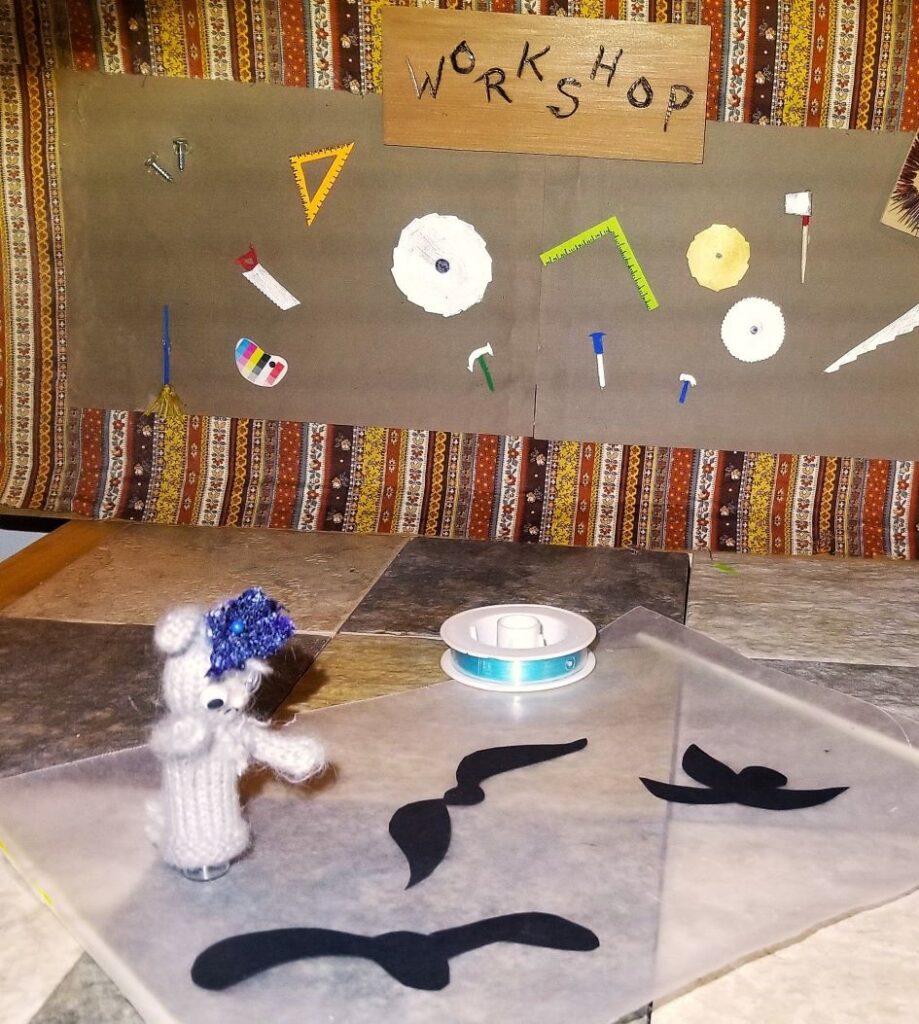
Draw or trace outlines of 4 flying birds onto black construction paper.
Carefully cut them out.
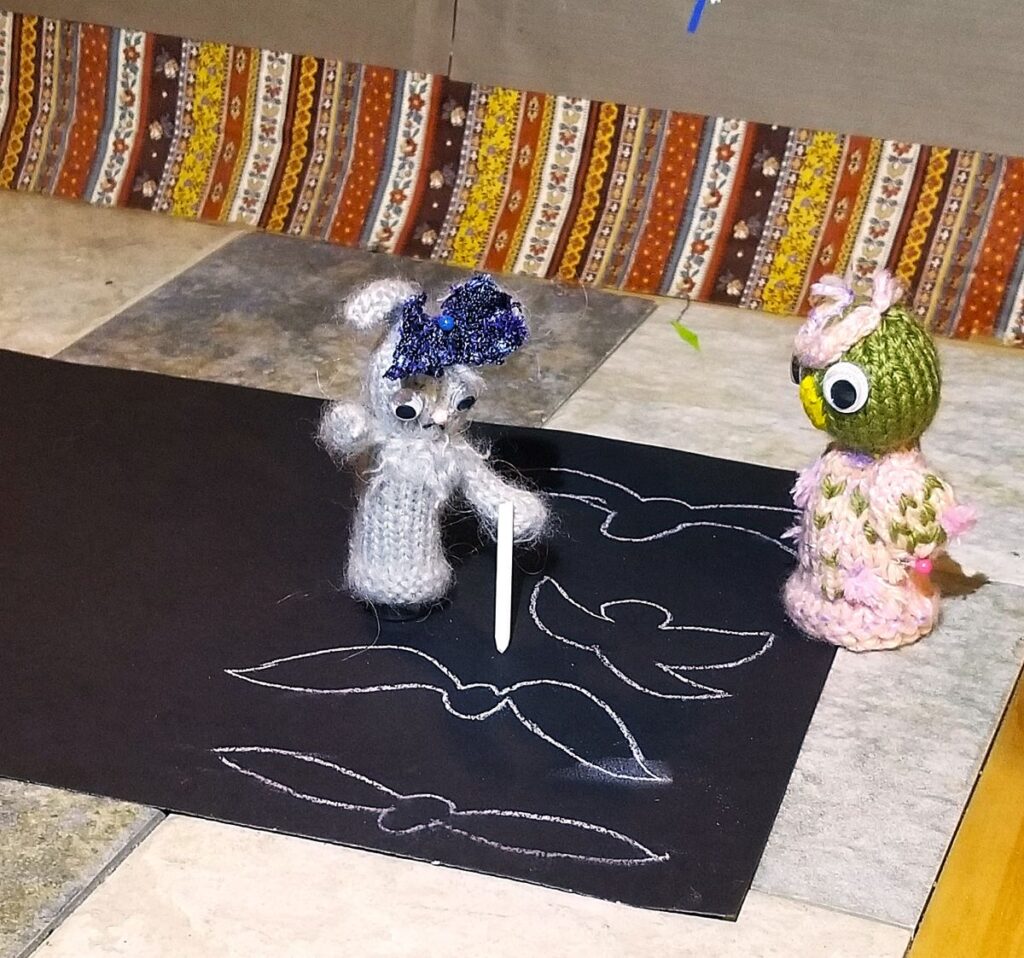
Cut a sheet of wax paper about 12″ long. Attach 3 bird cutouts to one side of the paper, using glue dots.
Turn the paper over and glue-dot or tape one straw to each side.
Hold the straws as you make the birds fly in front of your theater.
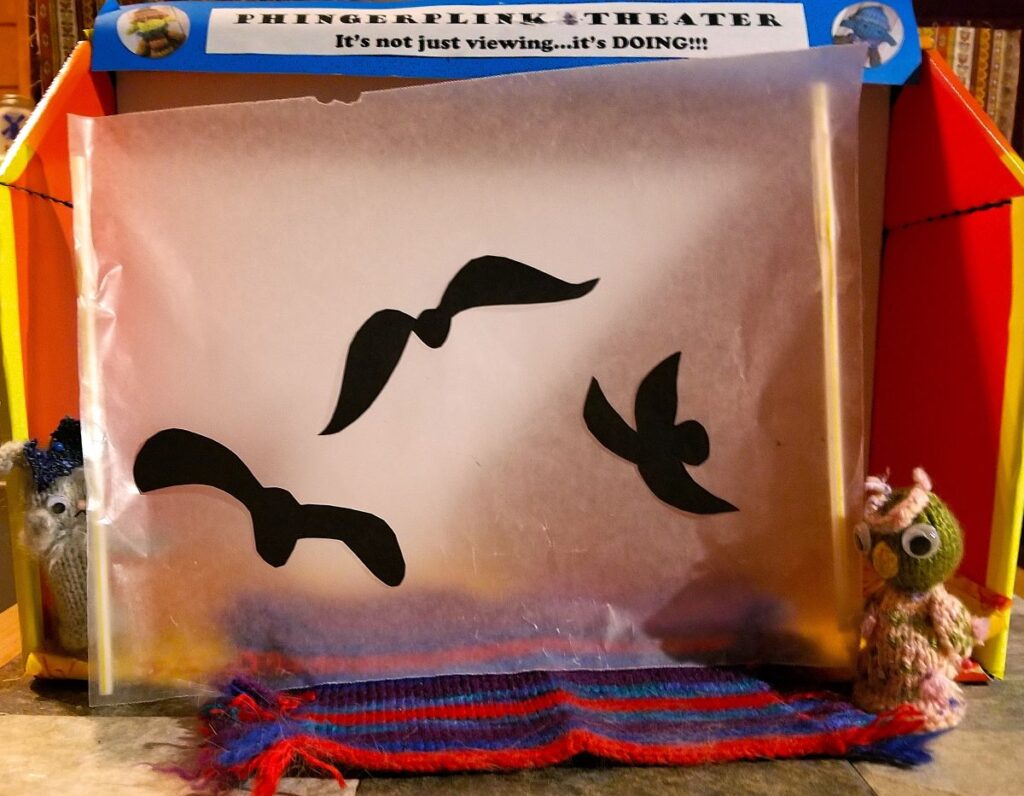
Glue-dot or tape a piece of straw to the back side of the 4th bird cutout. Be careful the straw doesn’t show beyond the wings.
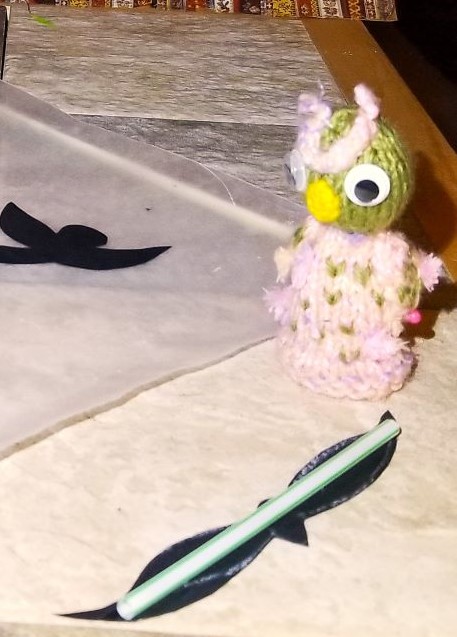
Cut a piece of fishing line (or thread or string) long enough to reach diagonally across your theater. Tape one end to a lower corner. Pass the fishing line through the straw-bird and slide the bird to the far end of the line.
Make sure your bird is facing the right direction . . . only hummingbirds can fly backwards! When you lift the line, the bird will slide down the string. If you lift too high, the bird will zip too fast for the eye to see. If you don’t go high enough, the bird will get stuck in mid air.
We can’t wait to see your ziplines and silhouettes! Be sure to send us a photo! phingerplink@gmail.com
Build your own Puppet Cottage with Babe E. Bear, Momma Bear, and Papa Bear!
You will need:
Scissors
A cardboard juice carton
Paint/Marker/stickers/catalog & magazine pictures
Glue/ruler or straight edge
Construction Paper
Scraps of fabric or felt
Using your ruler and a marker, draw a square for a window and large rectangle for a door. With an adult’s help, cut off the bottom of the carton. Do your best to keep it straight and level so your cottage doesn’t lean. Have an adult poke a starting cut in the window and door spaces, then use your scissors and follow your lines and finish the cuts. Make sure you cut only three sides of the door so it will open and close.
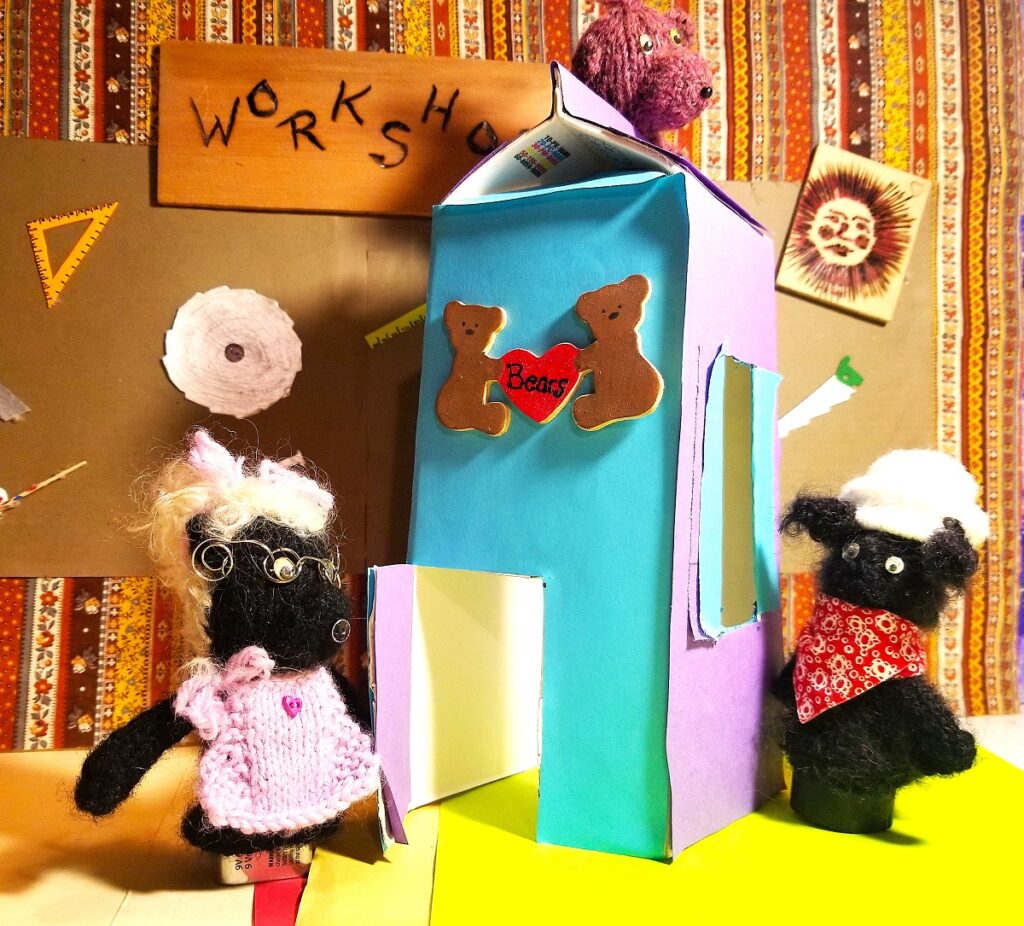
Decide what you want for colors for both inside and outside of your cottage. Measure the sides of the carton, cut out four rectangular pieces — you can make them different colors and glue them on the sides of the cottage. Let them dry
Cut four more pieces the same measure as the outside of your carton, and glue them on the inside for the cottage walls. Cut two squares of paper for the roof and glue it on. When the glue has dried, with an adult’s help, make a starting cut in the center of the window. Make a lazy “H” cut (the H is laying on its side), and you can fold back the paper for shutters.
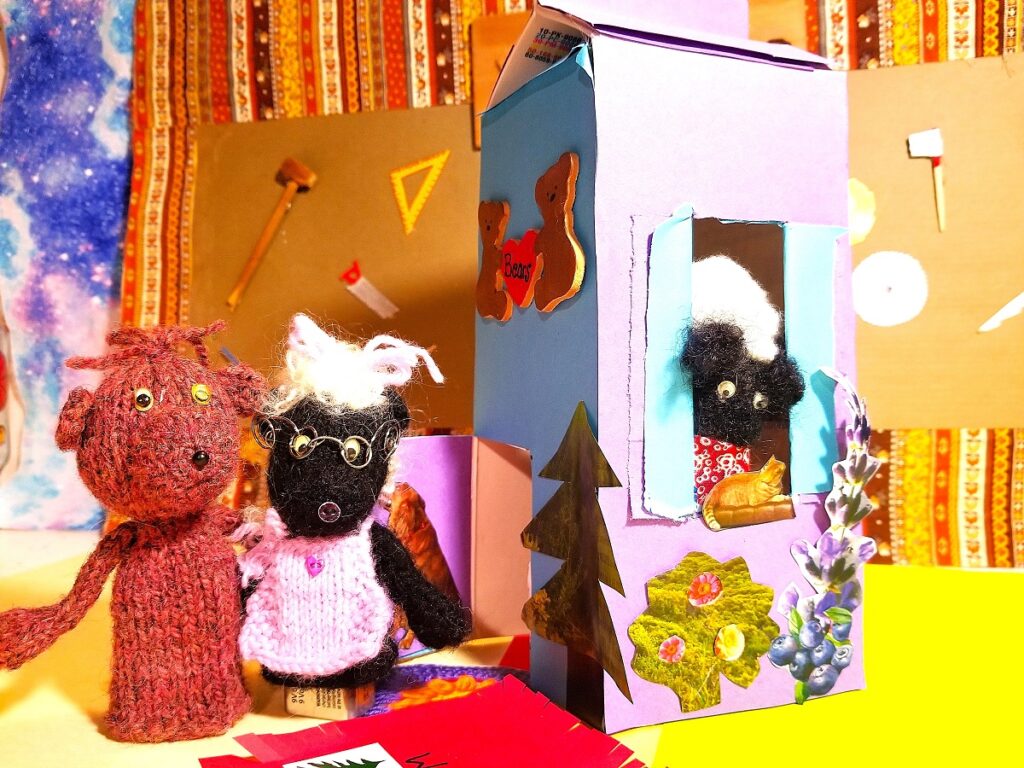
Now it’s time to decorate your space. Use markers and paint to make amazing wallpaper! Babe E. Bear’s tip: Use stickers, cut-out magazine pictures, and catalog furniture and glue them on the inside to complete your cottage. Glue flowers and shrubs around the outside to create a pretty garden. And don’t forget to make a welcome mat out of felt.
Have your puppets pop up through the bottom for a visit! Then take a picture and send it to us at phingerplink@gmail.com
Create special effects with Bear Bear and Sprite!
Are you ready to make some magic behind the curtain? Let’s go!
You will need:
Scissors
Pipe cleaners
Cotton balls/ aluminum foil/magazines
Glue/ glue dots
Glitter
Construction Paper/tissue paper/markers
Small paper cups Fishing line/Thread (sewing needle – optional)
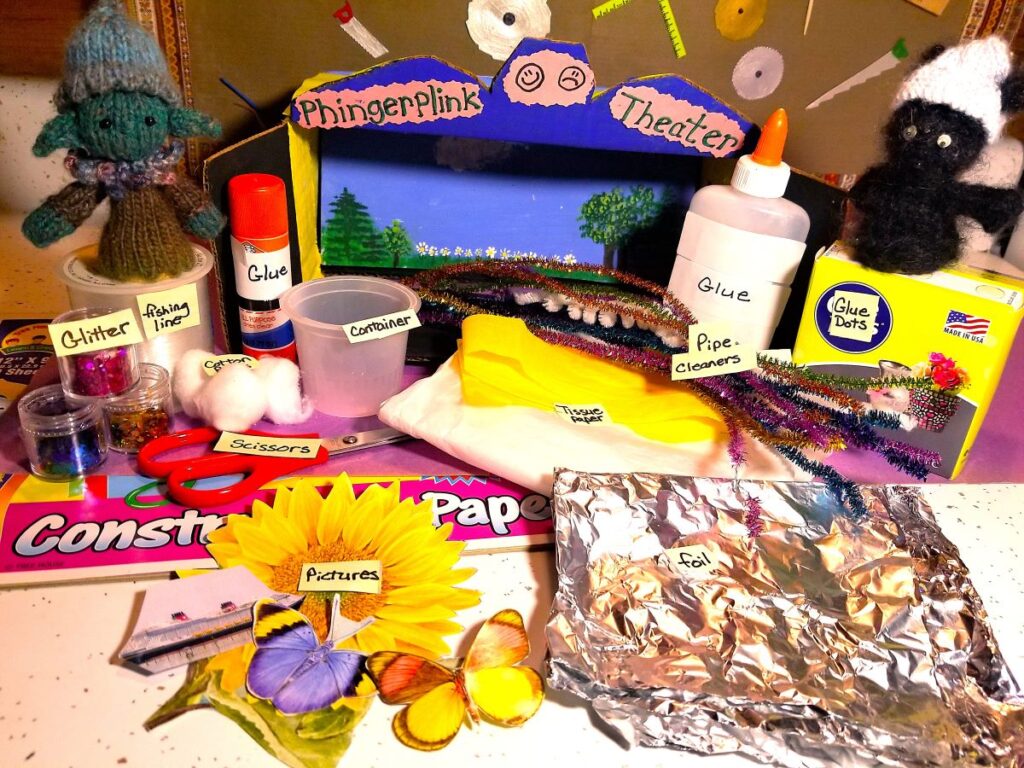
To make things move and jump, attach a piece of fishing line or thread to a character’s hat, or to a small prop like a book, a worm, a spider, or an umbrella. Keep the line loose while the puppet is on stage. When the time is right, jerk the line and hats fly off, books fall, worms and spiders jump, and an umbrella blows away.
As always, we can’t wait to see what you come up with! Have fun! And be sure to share your excellent special effects with us at phingerplink@gmail.com
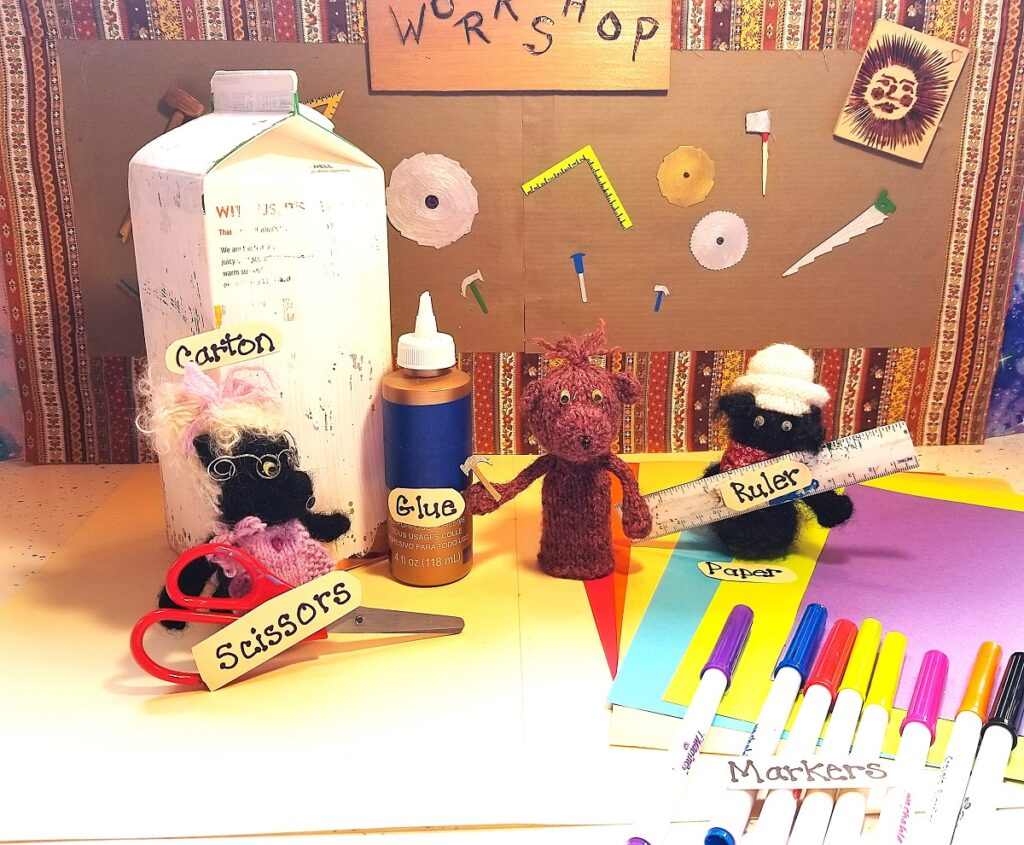
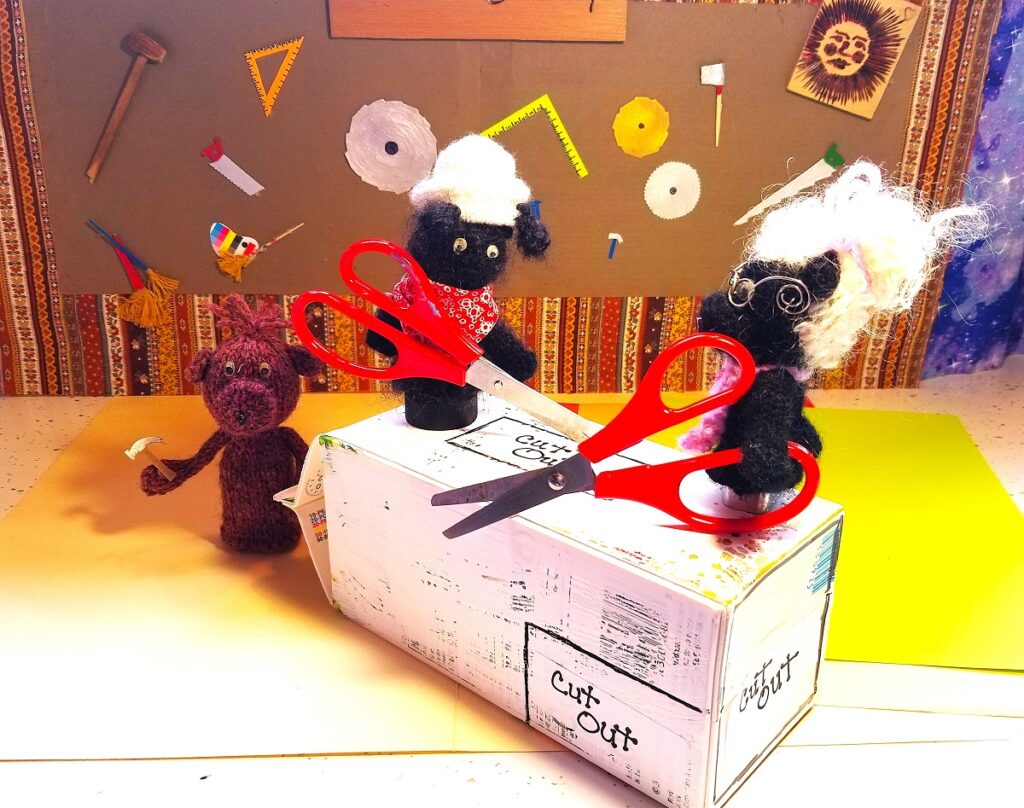
Make a secret hideout with Chip, Bun, and Skinky!
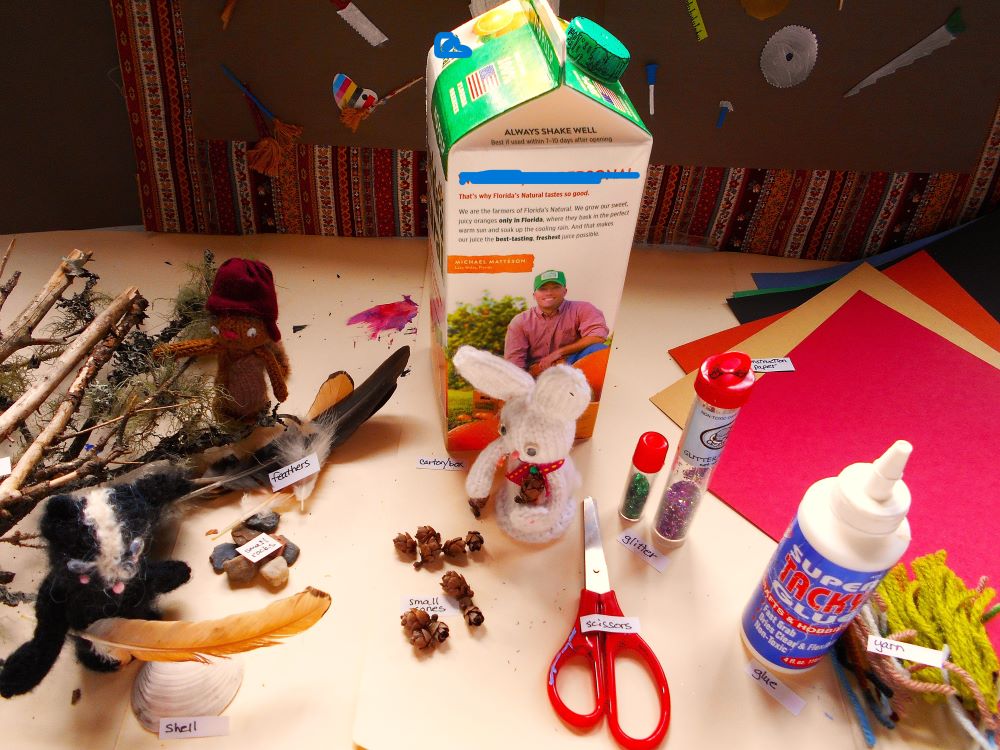
If you could build a secret hideout, where would it be? How would you keep it secret? Bun, Skinky, and Chip built their secret hideout from an old fruit crate and branches to help their place blend in with the rest of the Glen so it would not be discovered.
Now it’s your turn to make your secret hideout for your own finger puppets. You’ll need:
Box/container
Scissors
Glue
Sticks, rocks, paper, or whatever building materials you like
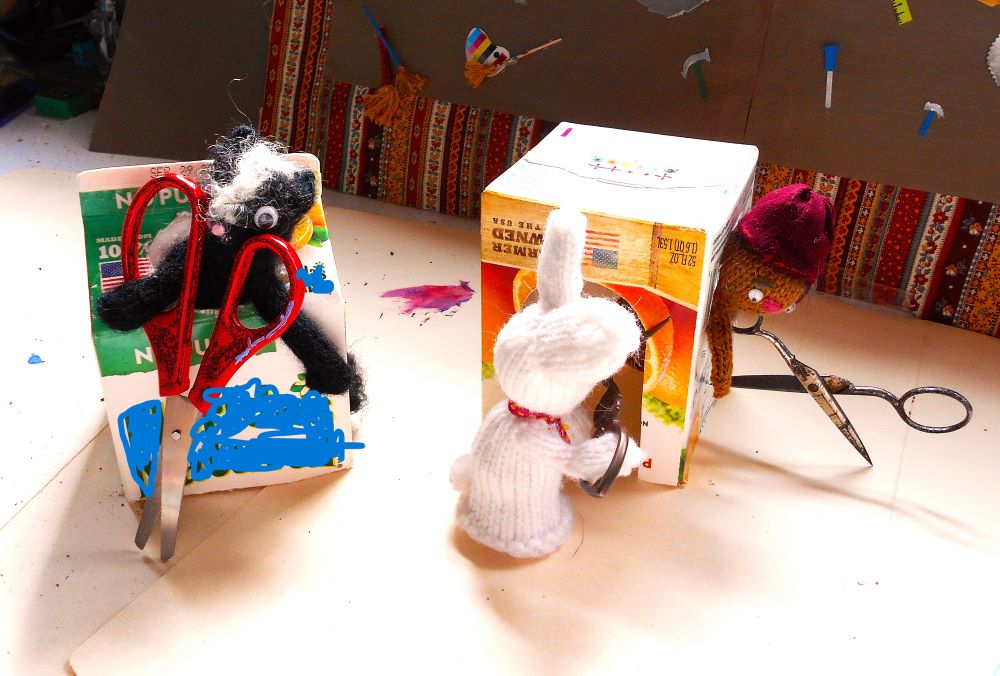
With adult help, cut the bottom off a juice container, rolled oat box, fruit box or whatever you’ve got handy. The bottom has to be cut off because your finger puppets can only pop up through a hole. Also cut a doorway in one side or a window in another side. Your puppets want to be seen!
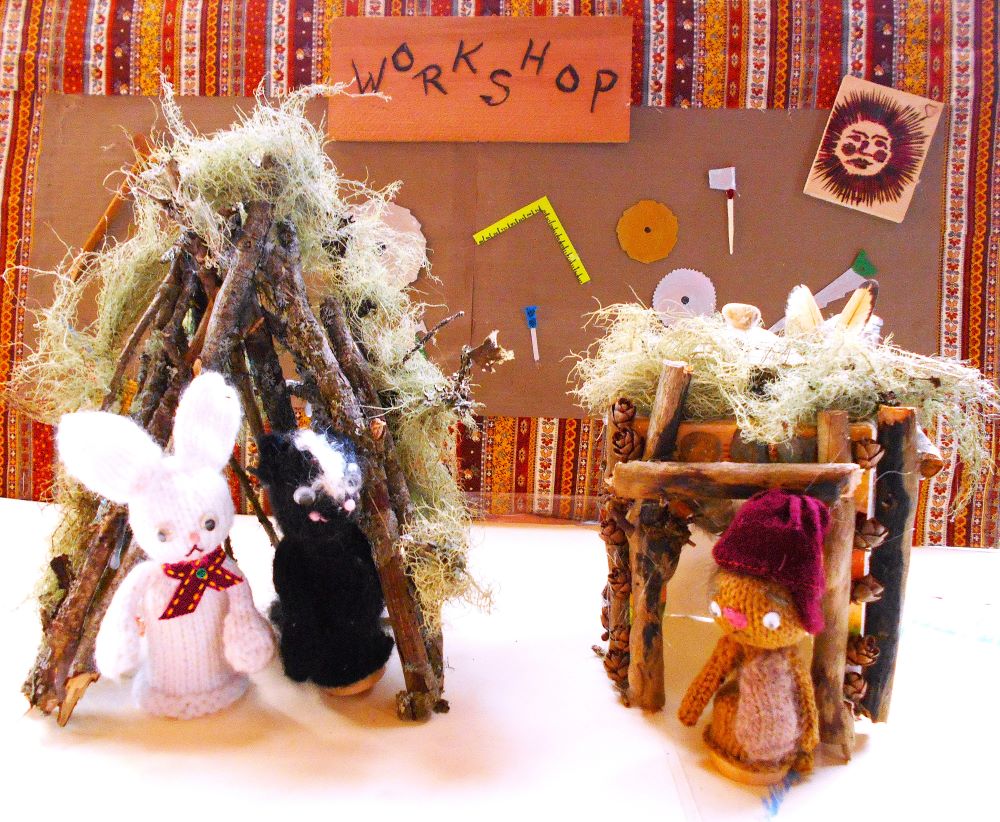
Cover each side with glue and attach sticks, cones, moss, pebbles — whatever you like. Give it time to dry before letting your puppets enjoy their new secret Phingerplink hideout.
And don’t forget to email us a picture so we can be dazzled and amazed, too! phingerplink@gmail.com
Make your own bully puppet with Chip and BB!
Bullies come in all sizes and shapes. They can be boys or girls. Is BB a boy or a girl? Is Chip a girl or a boy? In the play, it never says, so we don’t know, do we?
If you haven’t made a finger puppet yet, scroll down to MAKE YOUR OWN FINGER PUPPET WITH THE STORY TELLER for basic instructions. Our bully puppet will build on that.
You will need:
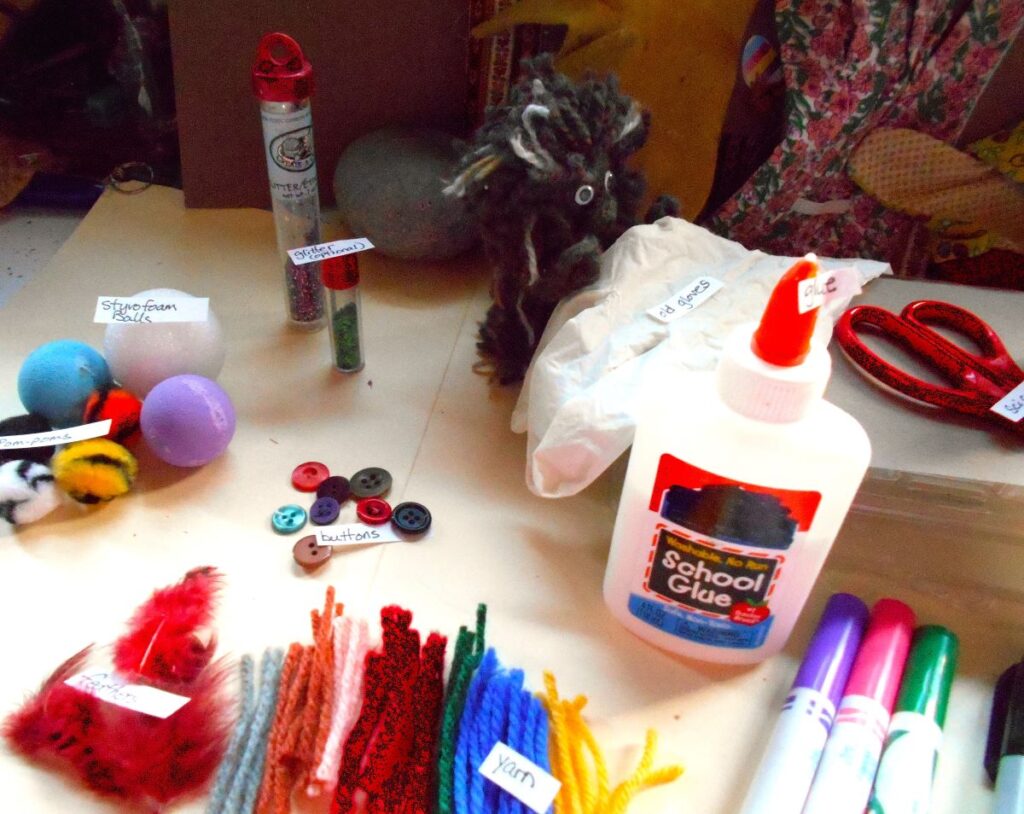
ping pong ball, styrofoam ball, pompom, or large bead.
A glove
Small square of cloth
Scissors
Markers
Google eyes/buttons/sequins
Unpopped popcorn, sunflower seed, pasta
Twist tie
Yarn or string
Pipe cleaner
Glue
Construction paper or cloth
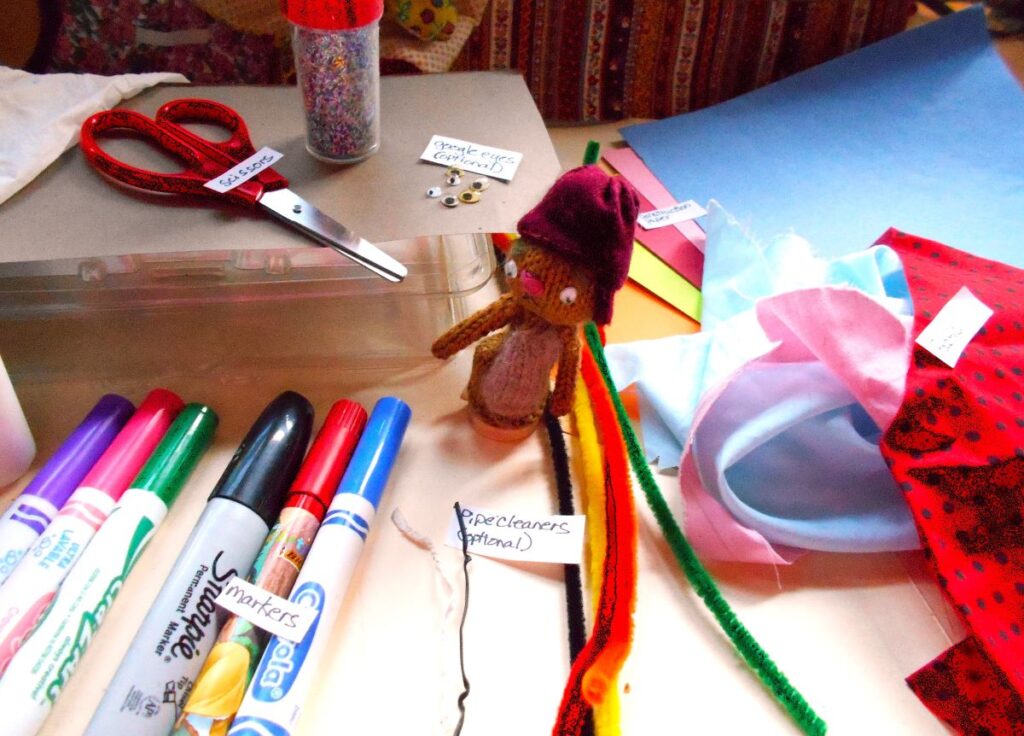
Cut one finger off the glove. Cover ball with piece of cloth (do not glue). Cloth should be larger than the ball so you can gather up the cloth ends and tie the ends around the glove about 1/3 of the way down the finger.
Glue on eyes/buttons/sequins. Glue popcorn/seed/pasta for nose. Color twist tie with markers. Glue on pieces of twist tie for ears and mouth. Glue on pieces of yarn for eyebrows and hair. Let dry.
Fold pipe cleaner in half to find the middle, unfold and make a circle in the center of the pipe cleaner that fits over your finger. Twist to hold together. Slip circle onto the finger puppet body, bend ends of pipe cleaner to form arms and hands.

Use your imagination to add costume, color, and character to your bully.
Don’t let this character bully your other puppets.
Create skits where kindness wins. Have fun!
And be sure to send us a picture of your creation to phingerplink@gmail.com
Create a Word Person and a rap with Bristle Bean (BB)!
You can build with words, or you can build with construction paper, glue, pipe cleaners, hammer, nails, boards, glue, or tape! Or both! Building with words gets our thoughts and imagination out there so we can share with others. Let’s build a Word Person!
You will need:
Words (typed or hand printed)
Markers or crayons
glue or tape
2 pipe cleaners
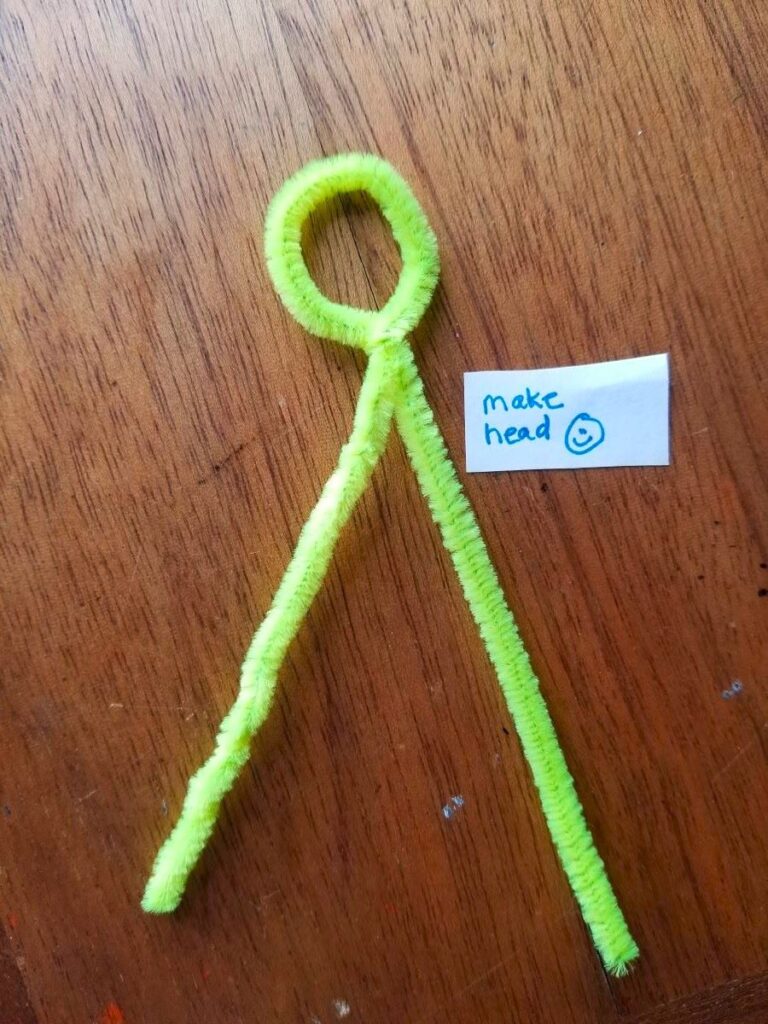
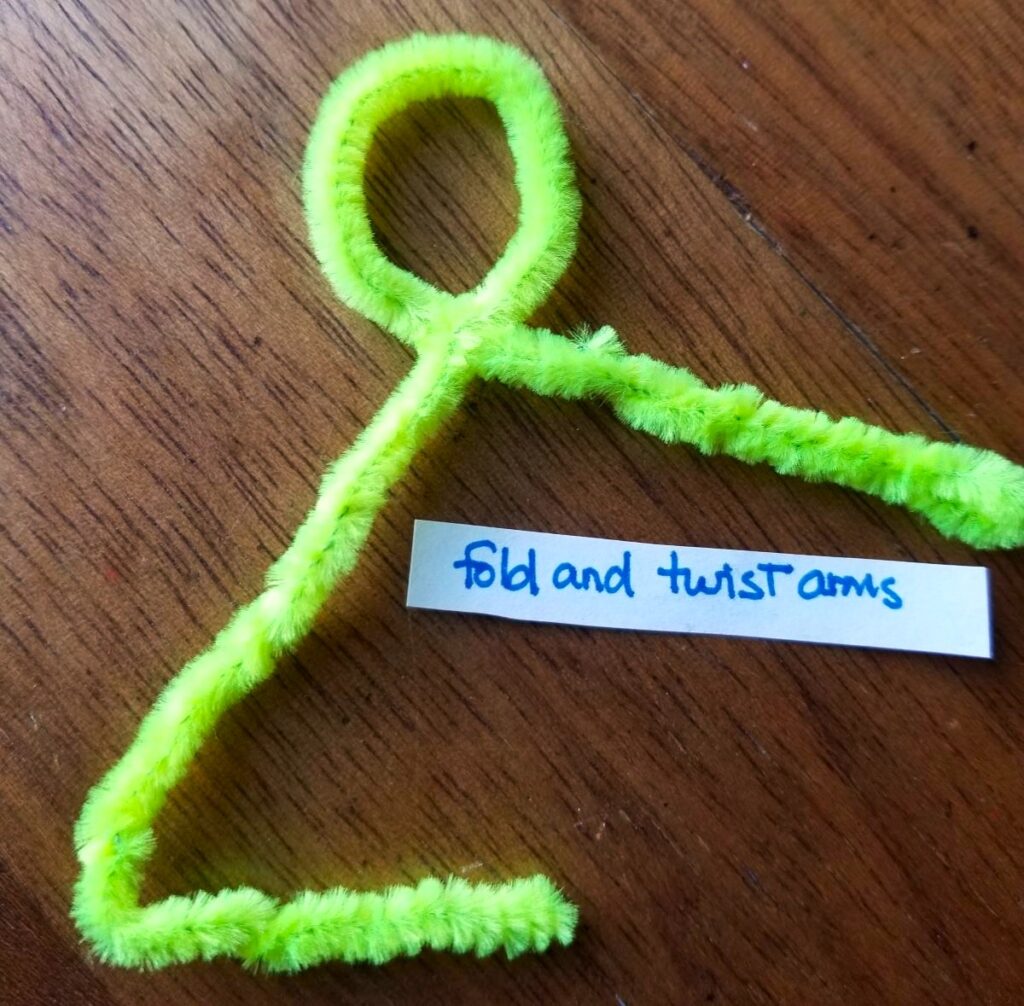
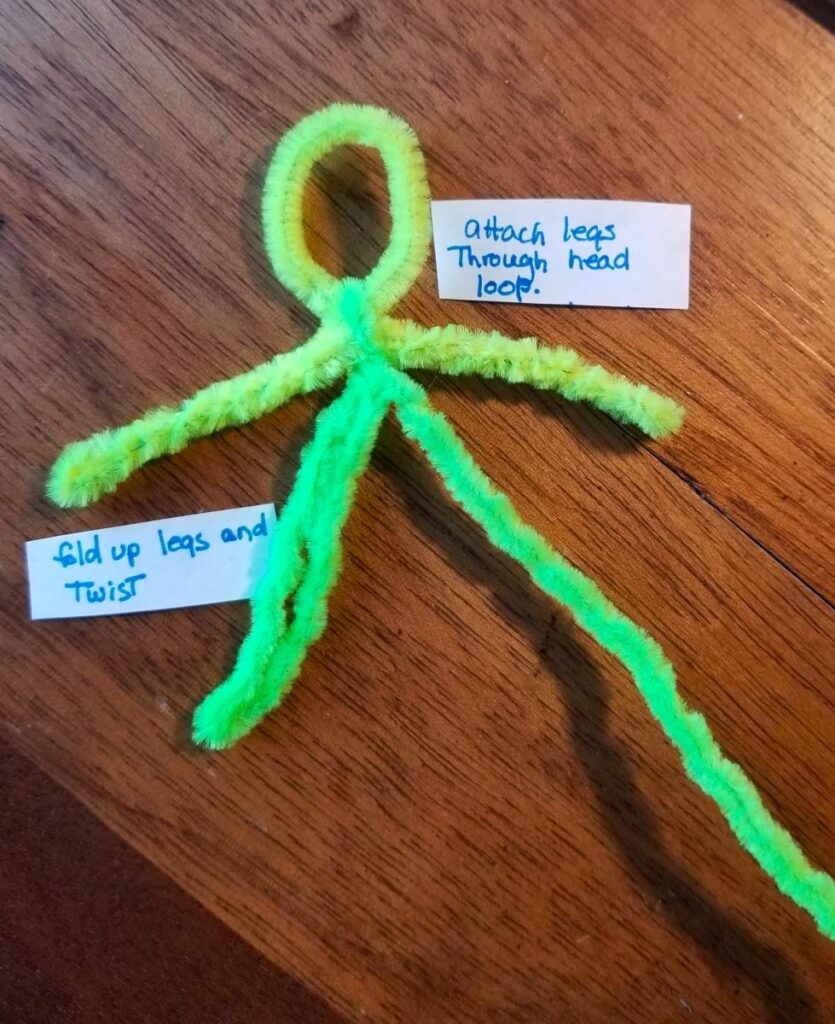

Follow the steps above to create your pipe cleaner figure. BB made a running shape.
Carefully cut out your words and glue or tape them onto your Word Person. Now create a rap using some (or all!) of your words. Here’s BB’s version:
You wanna rap in BB style? It’s all good but might take a while.
Use all your words … don’t be shy. Tell your story, tell us why
the Moon looks like moldy cheese, the ants don’t know their ABC’s
Daytime, nighttime, anytime. I don’t like lime but I love rhyme!
That’s the latest story line from this rad rappin’ Porcupine!
Be sure to send us a copy of your rad rap along with a picture of your Word Person to phingerplink@gmail.com We’re excited to see what you can do!
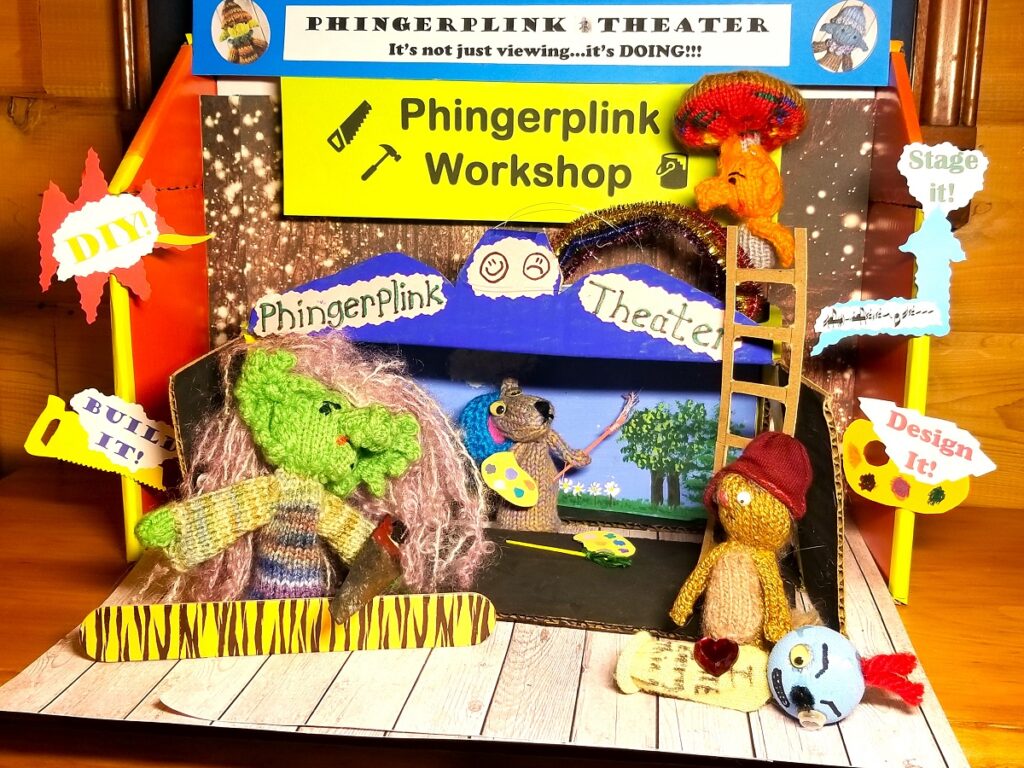
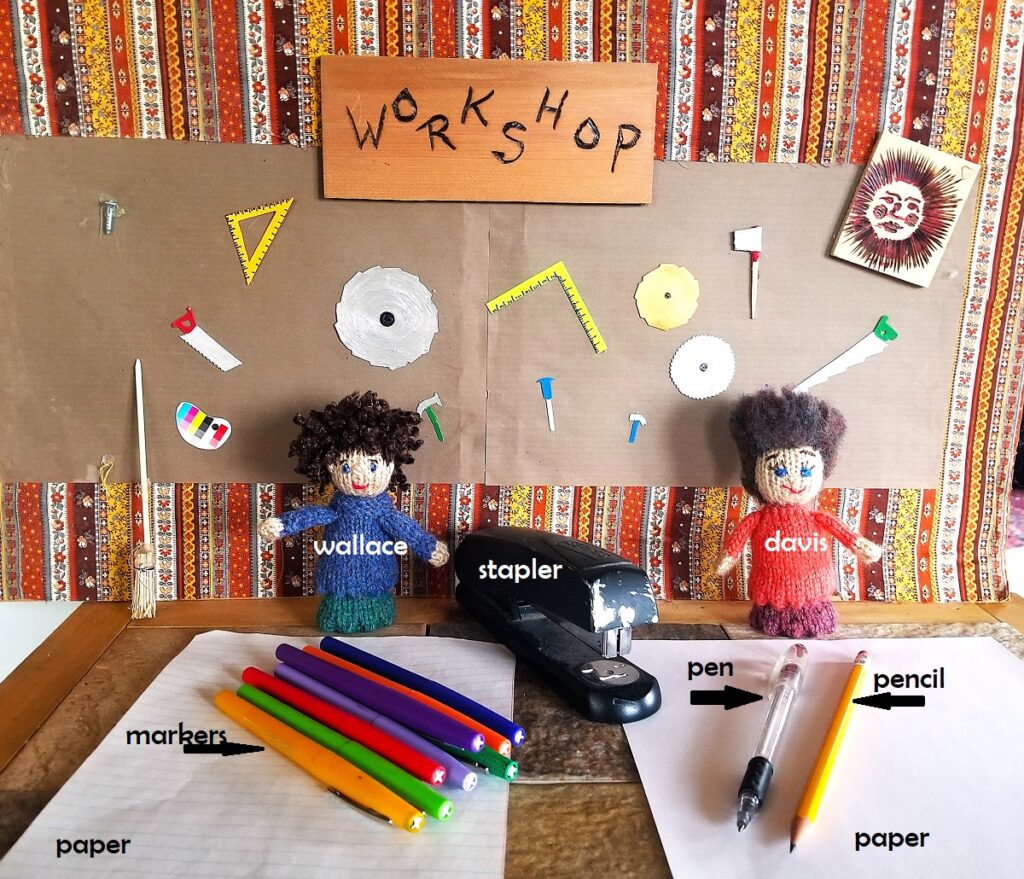
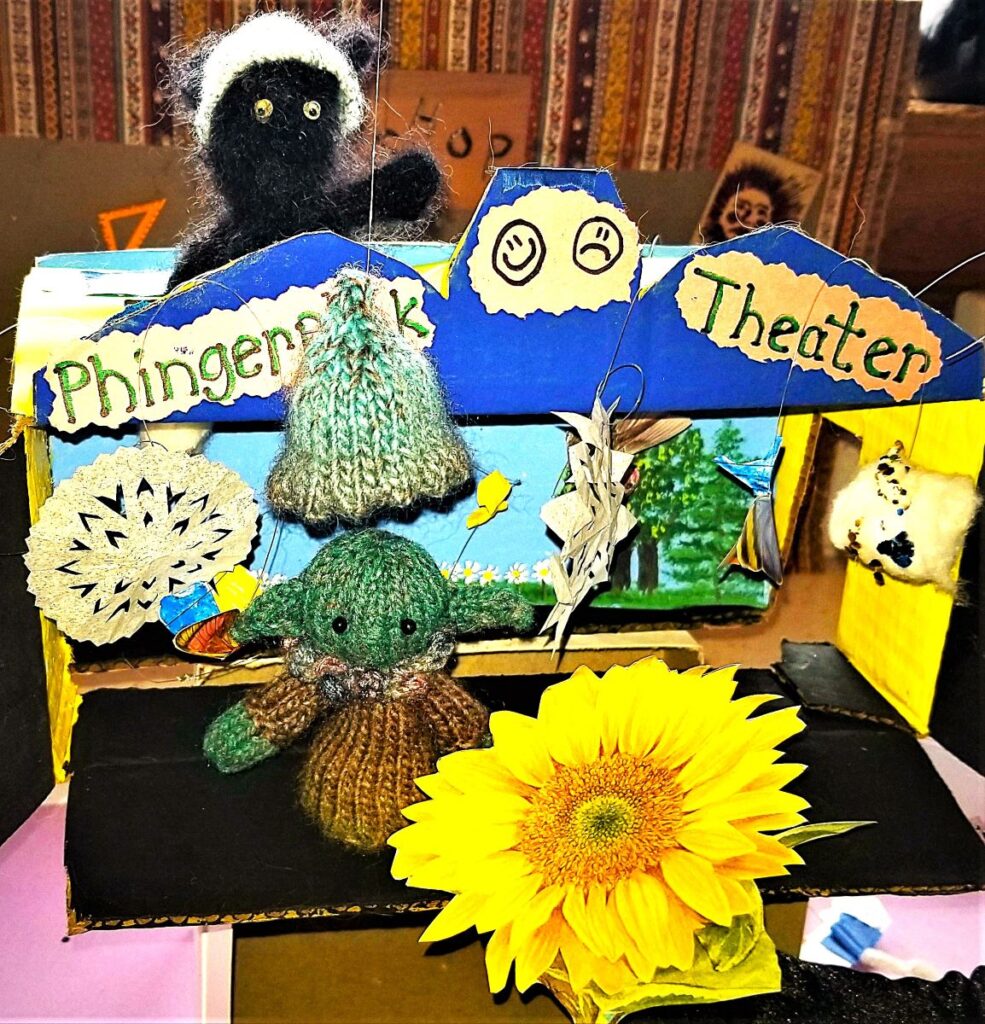
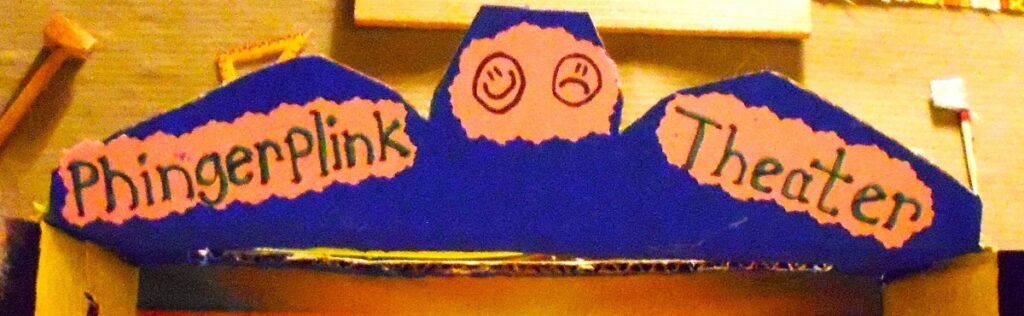
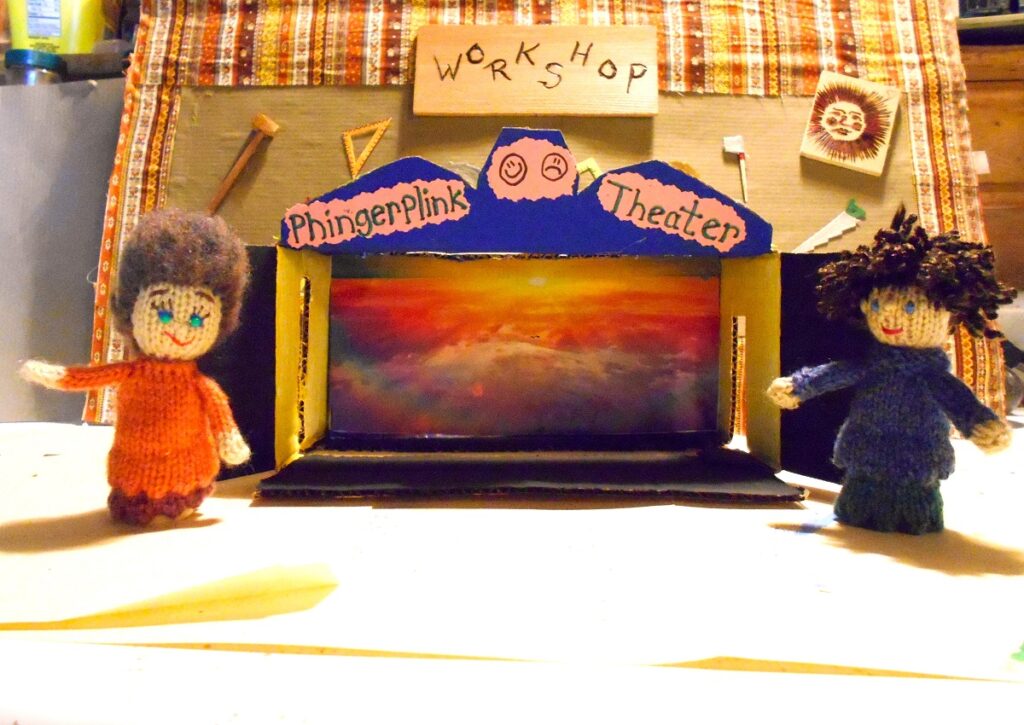
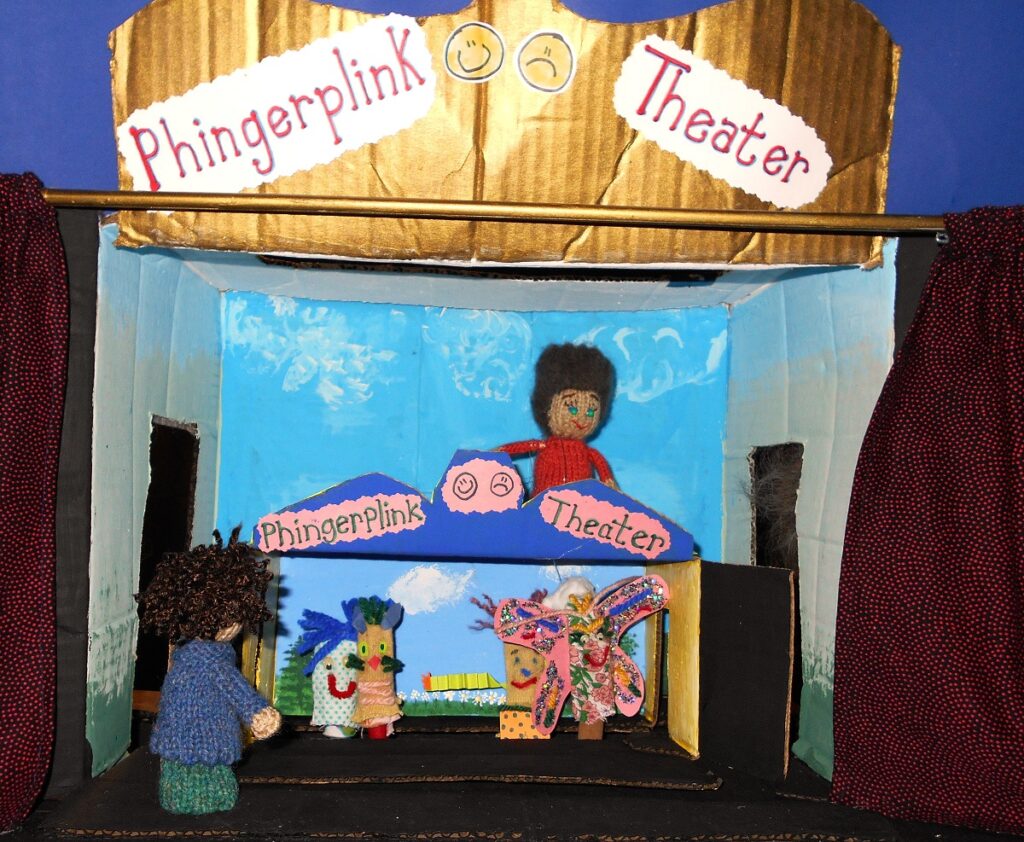
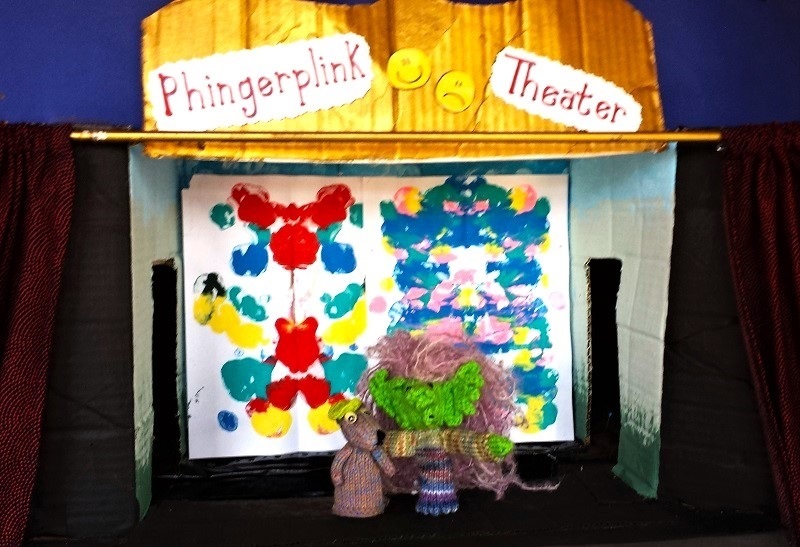
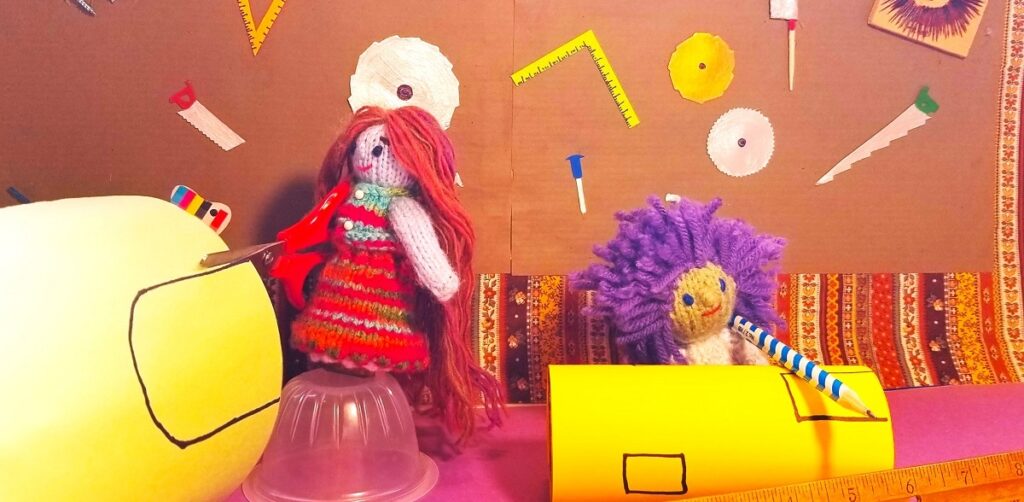
Create your own theater with Wallace and Davis!
You will need:
A box (shoebox or medium-sized)
Ruler * Scissors * Glue * Fabric
Paint * markers * colored pencils
Paper (construction/cardstock),
magazine or calendar pix
With the open end of the box facing you, use a ruler to measure out from the back of the box 1 ½”. From this 1 ½” line, mark a 2” wide slot on the long side of the box. With adult help cut out the 2” wide slot in the side of the box (see the black outline). This is where the puppets enter the stage.
On the top side of the box, make a narrow slit along the back edge (see the blue outline) Again, have an adult or older sibling help you. Then measure 1” toward the front of the box on both ends and draw a line to connect them, then draw another line 1” from this one. Measure from each side toward the center of the top, 2” and draw another line, then cut out the rectangle (see green outline), having an adult or sibling help you. This is where you can hang clouds, or flying squirrels, rainbows, birds… anything that drops from the sky!
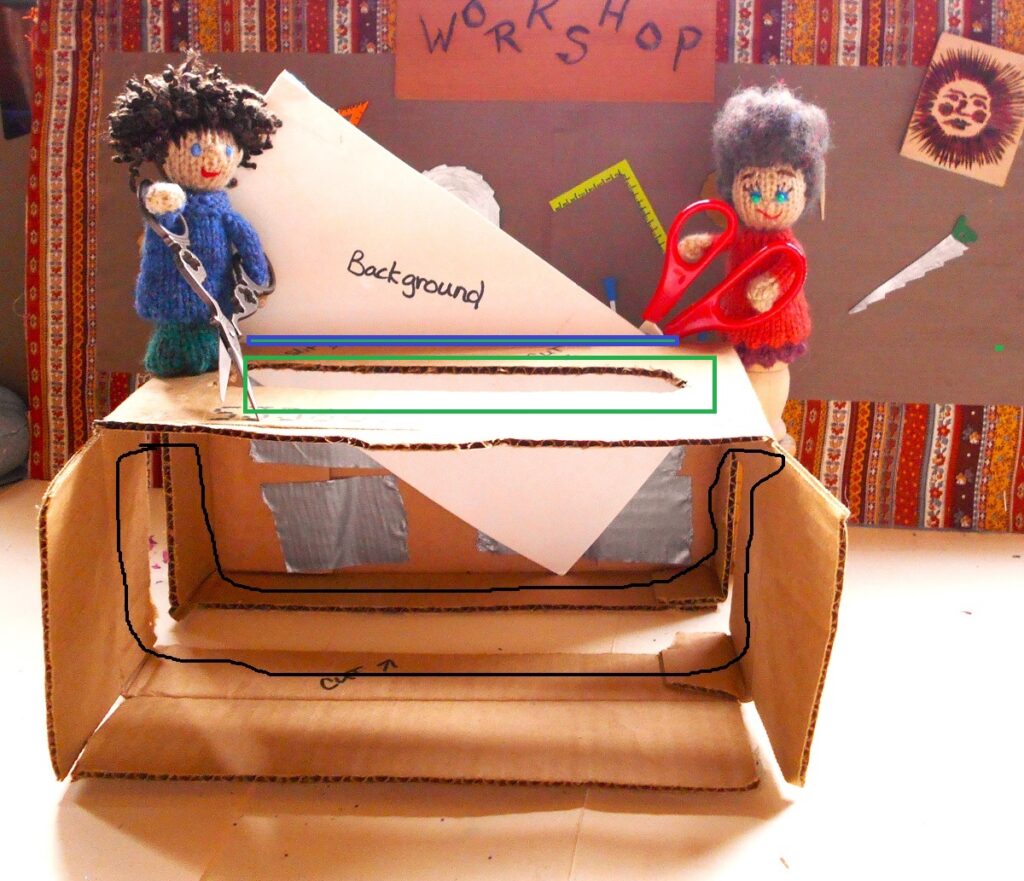
Create your Theater Name (Marquee). You can cut a fancy design (see red line), or just go straight to the markers, glitter, or paint. It’s up to you!
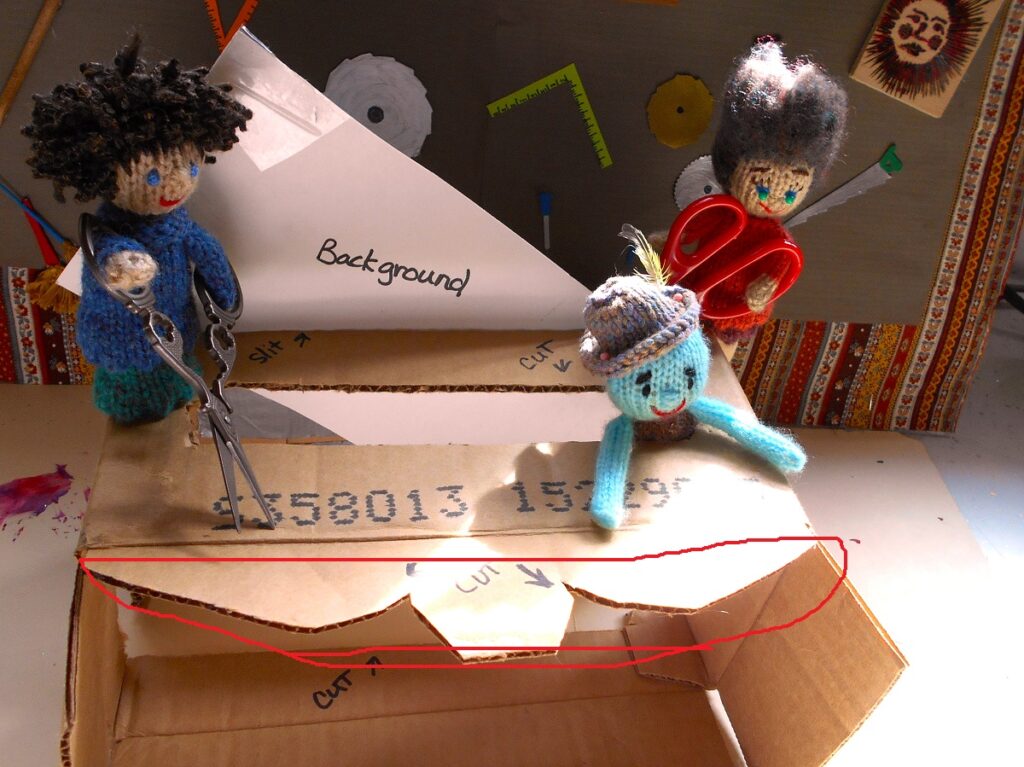
Next, using markers or paint, color the floor and paint a background for the walls. It can be a waterfall scene, an operating room, a moonscape, it’s up to you. If you want different back drops, measure the back of your box, cut construction paper or card stock ¼” smaller than your measure.
Draw artwork scenes, or glue magazine or calendar pictures to the construction paper or card stock. When they are dry, insert one in the slot at the back of your box to change the scene.
Show us your stuff! phingerplink@gmail.com
Create your own finger puppet with the Story Teller!
You will need:
A glove (knit, rubber, plastic, leather, cloth, new, old, garden or work)
Scissors * Markers * Yarn or string * Small buttons,
googly eyes * ribbon * Glue *
Construction paper or cloth
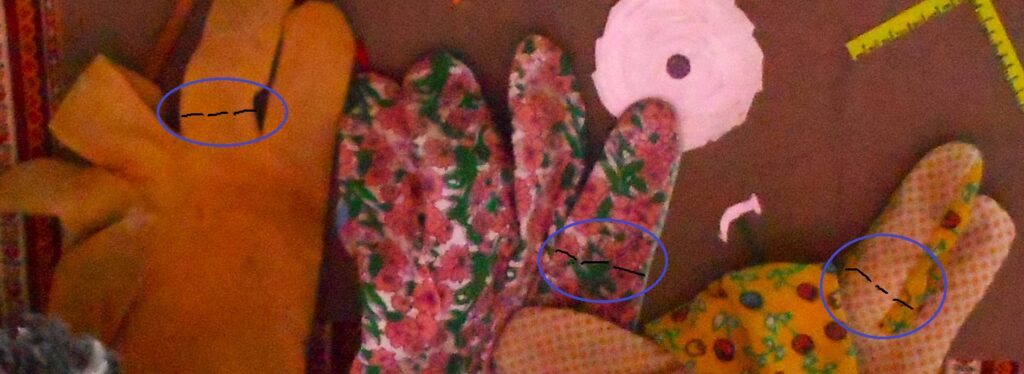
Cut fingers off gloves (see blue circles).
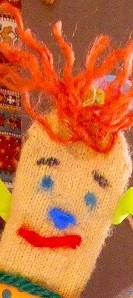
With colored markers draw eyes, nose and mouth on the fingertip or cut eyes, nose and mouth out of paper and glue on face. Or glue on googly eyes for a fun look. Cut short pieces of yarn or string and glue on top for hair (you can color strands with markers or use different color yarn pieces).
Accordion-fold narrow strips of paper for arms. Glue hands, paws or claws on one end of the folded paper strip and glue the other end to the shoulder area.
Add glitter, buttons, wings, ears, ribbon, or whatever. Phingerplink puppets don’t go for costume changes. Their outfits are part of who they are.
Use the other cut-off glove fingers (and thumb!) to create your own cast of characters. Invent different accents and voices for each character. Have fun!
Well done! There’s nothing stopping you now!
Be sure to send your photos to phingerplink@gmail.com
Make your own backdrop with Wolf & Zelda!
You will need:
Paper * Your favorite colors of paint
Markers * Color pencils * Glue stick
Poster board
On a flat sheet of paper drip small drops of paint, thin lines and zigzags at random spaces.
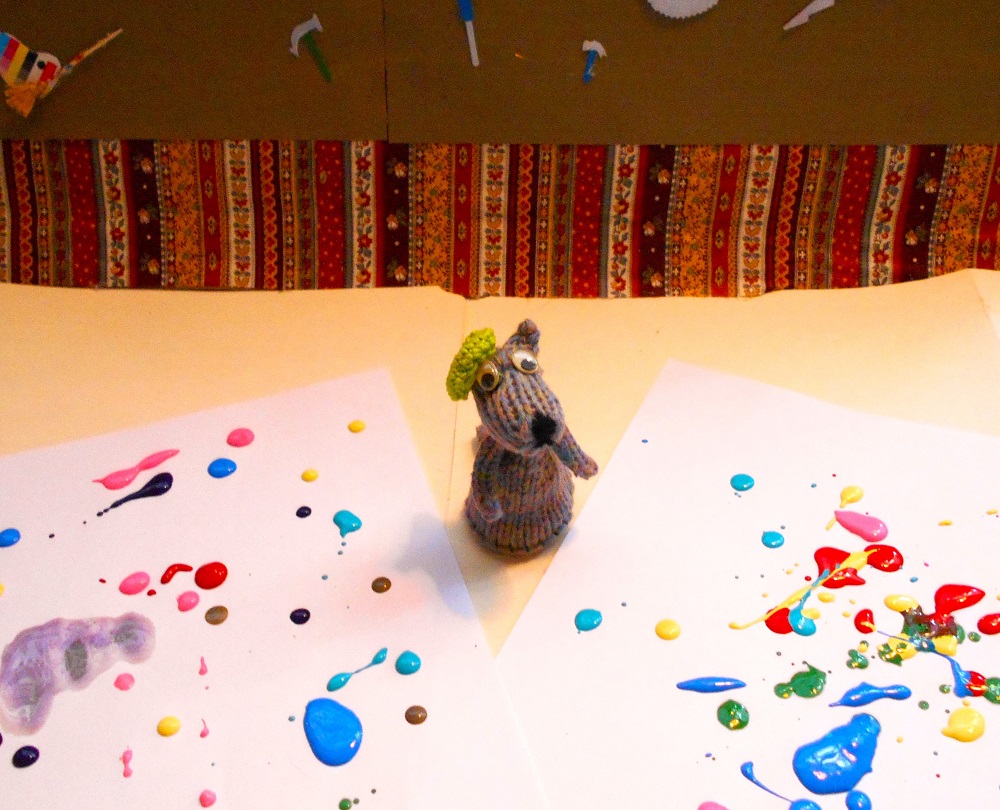
When you have all the colors you want, fold your paper in half and rub your palm across the outside to squish the paint inside.
Carefully open the paper to discover the original art design you’ve created. Let dry flat (use a small piece of tape on the edges to keep it flat, if needed.)
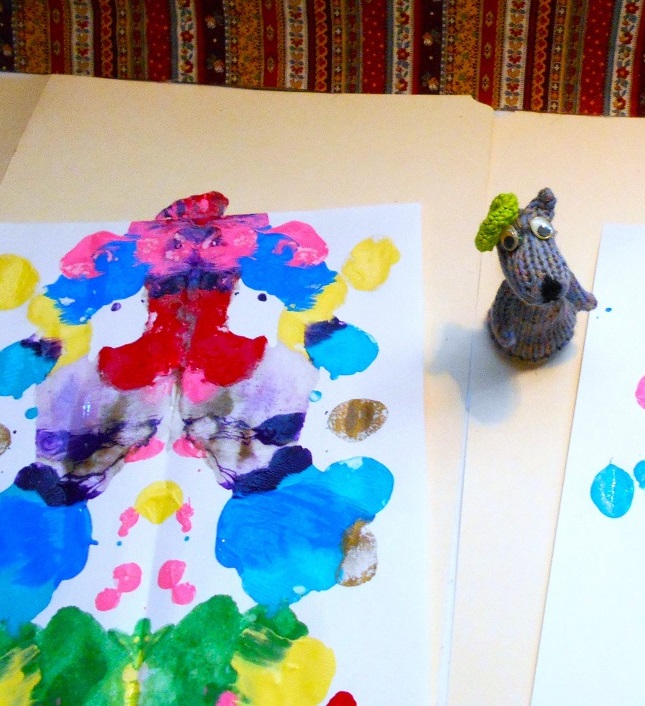
Once the piece is dry, glue it on a piece of cardstock or poster board and use it as a backdrop for your next theater production. Try different colors, placement, and size of paint blobs, to create new masterpieces. Don’t be afraid to create something wild!
Excellent! Show us your work with a picture to phingerplink@gmail.com
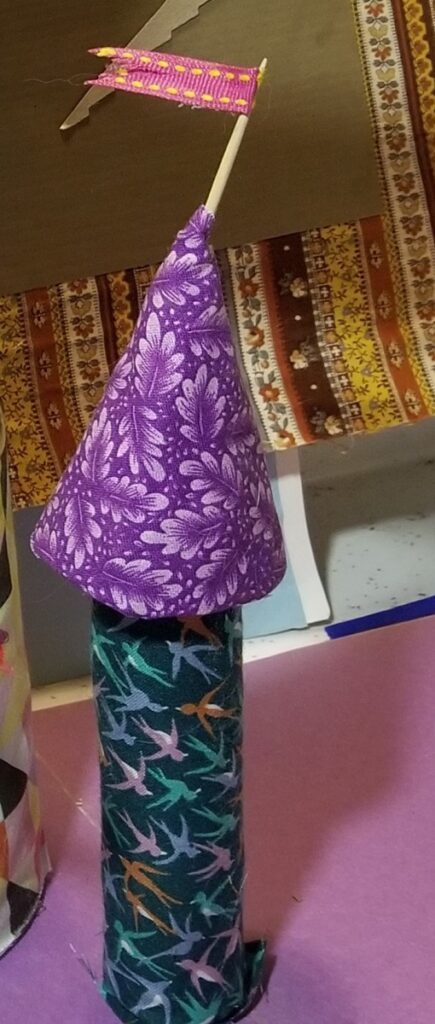
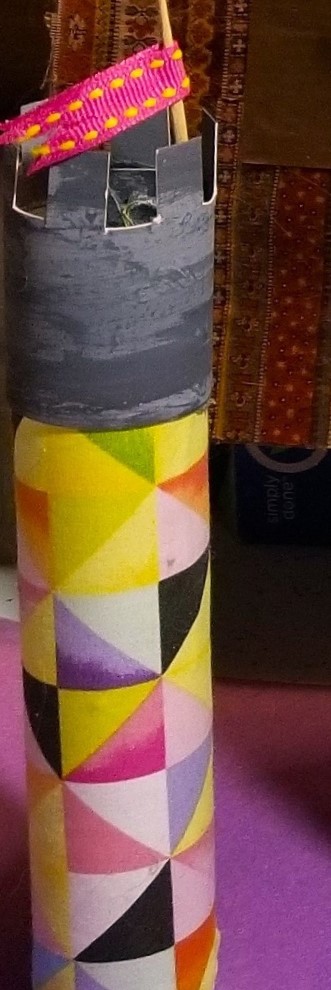
Make your own castle with Queen & Sew-Sew
You will need:
Scissors * Paint * Markers * Stickers
Round oatmeal or corn meal box
Paper towel roll * Toilet paper roll
Glue * Ruler or straight edge
Construction Paper * Glitter *Sequins
Scraps of fabric/felt/yarn Pipe Cleaners
Remember to build your castle with the bottom floor open so your puppets can pop up inside. Wrap your boxes in colored paper and secure in place with glue or tape. Draw lines for doors and windows and have an adult help you cut them out. Leave one side attached if you want your door or window to open and close.
Using a ruler or straight edge, make a zig-zag or rectangle design on the long edge of a sheet of construction paper. Cut out your design and glue it around the top of your round container.
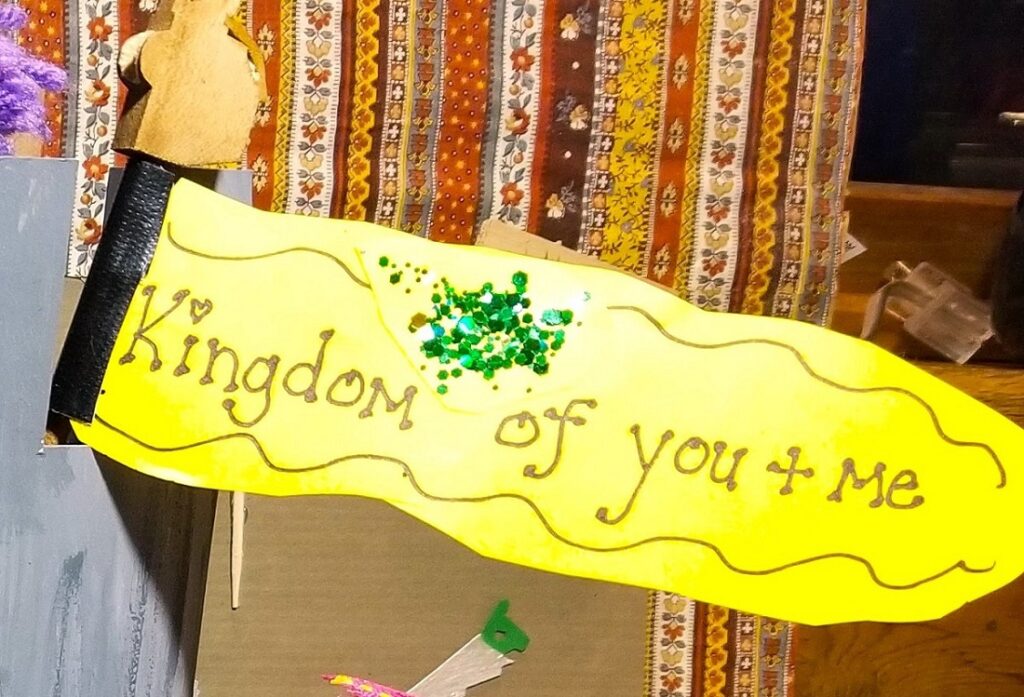
For your kingdom banner, cut a triangle or square out of paper or felt. Using markers, stickers or glitter and glue create a design on your flag. Glue your flag to a pipe cleaner. Poke a small hole in the roof and stick in your flag pole and let your kingdom banner fly.
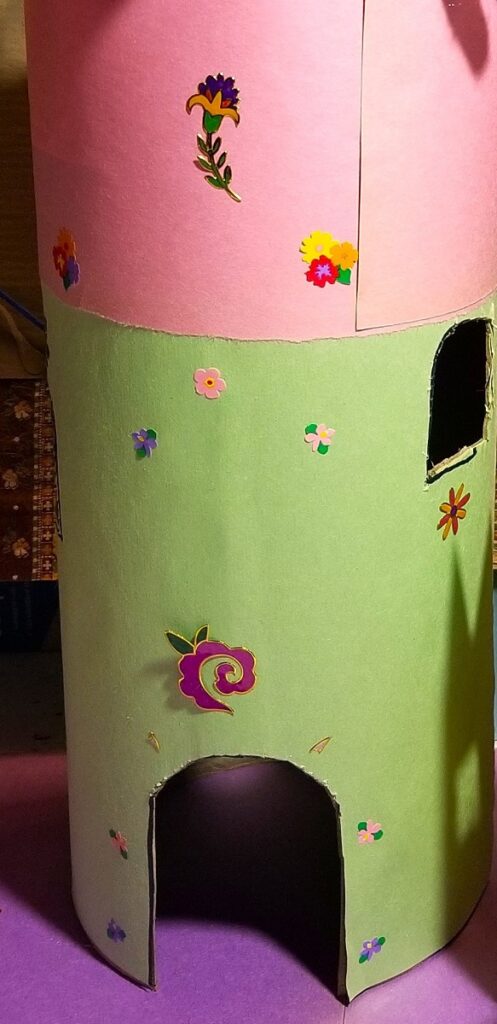
Using paint, markers and yarn, stickers and glitter, decorate your castle to make it look cool.
You can make several towers of different sizes to add to your kingdom.
Assemble your castle, towers, and turrets to create your own dashing kingdom.
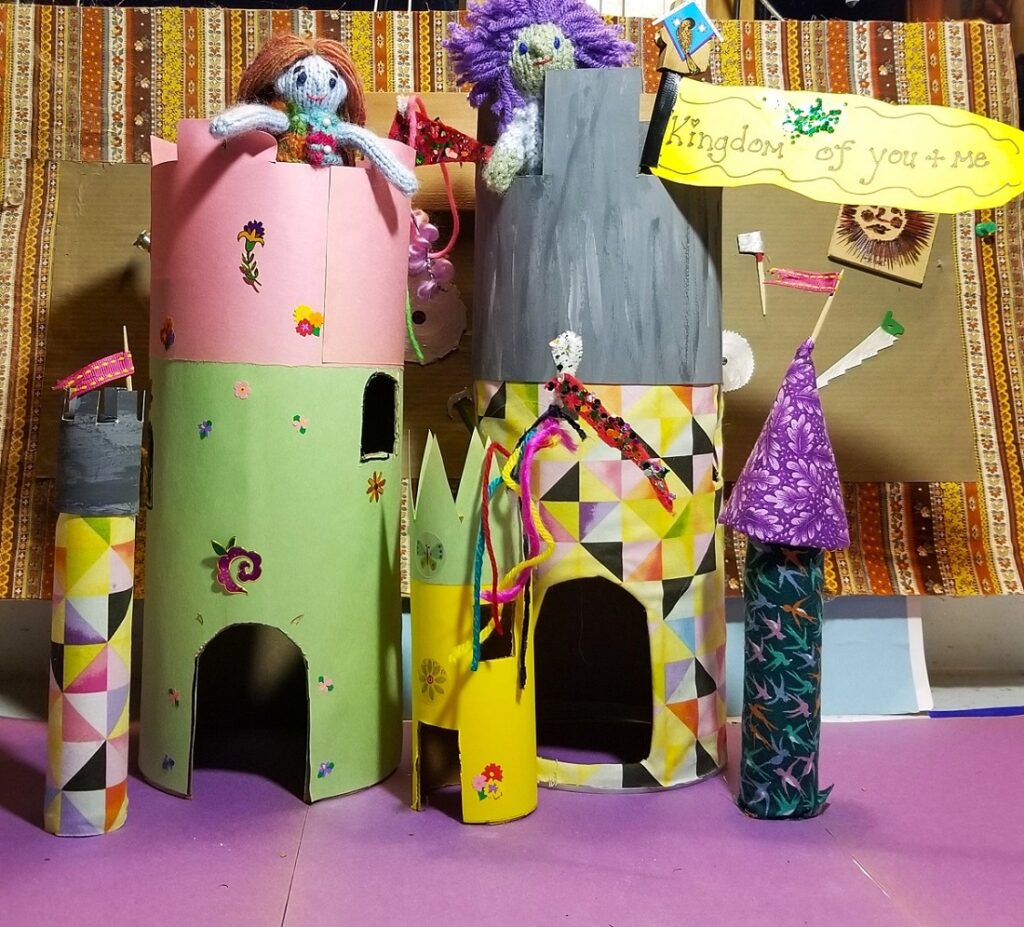
You can make crowns and gowns for your puppets and have them pop up in the windows and doors. Have fun ruling your kingdom!
And remember to send your pictures to phingerplink@gmail.com
Can’t wait to see your beautiful creations!